Theme Schedules
Since you can create multiple themes, you might also want to set up schedules to automatically switch between them based on the time of day.
This feature is great for when you need a light theme for sunny afternoons, a dark theme for late-night work, or simply want the design to reflect your mood.
Default Schedules
Definer comes with four thoughtfully designed schedules to get you started:
- Disabled: Keep full control with no automatic switching
- Daily Cycle: Syncs with your natural day/night rhythm - light theme during daylight hours, dark theme after sunset
- Vibrant Pulse: Refreshes with a new color palette every two hours so you never get bored
- Green Peace: 4:20 PM is always a good time for a calming green theme. It will gently transition back at 6 PM.
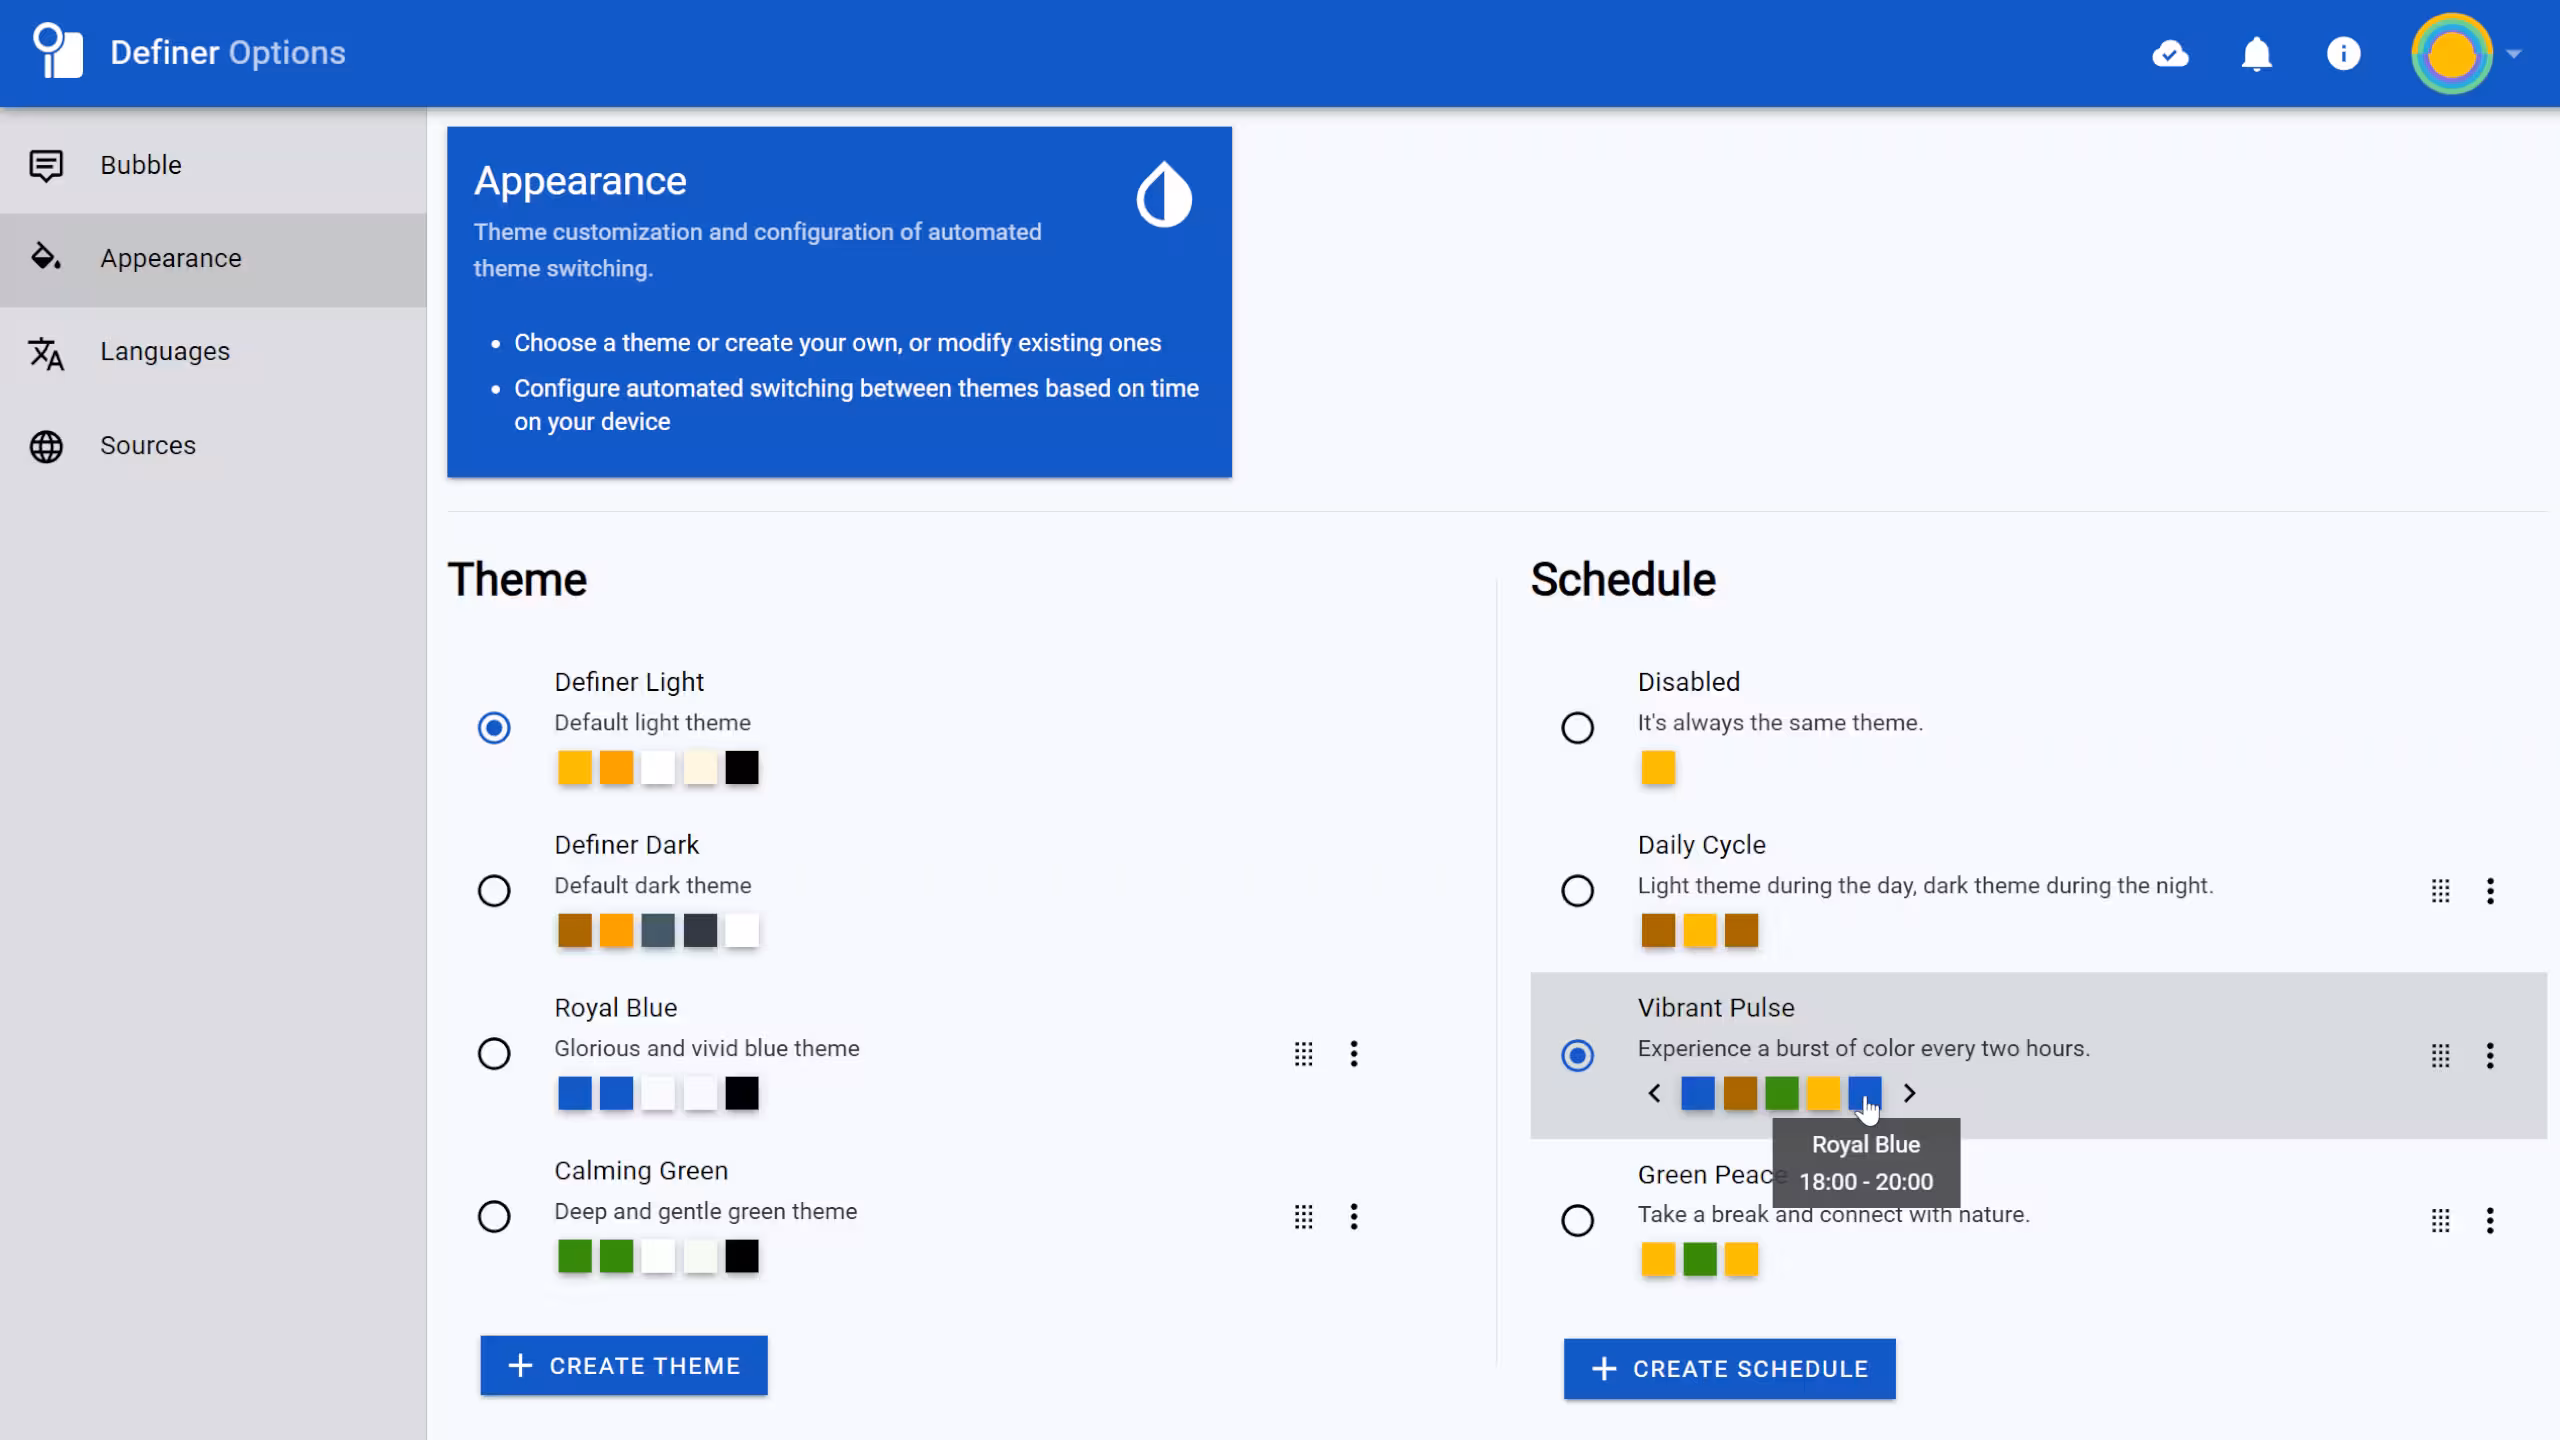 Definer's default schedules
Custom Schedules
Although the default schedules are great, you might want to create your own custom schedules.
Fun fact
Even the "default" schedules are actually custom schedules in disguise - you can edit, remove, or reorder them as you please!
Creating a Schedule
To create a new schedule:
- Navigate to the Appearance page in Definer Options
- Click the CREATE SCHEDULE button
- Use the schedule editor to map out your theme timeline
Managing Existing Schedules
Click the three-dot menu (⋮) next to any schedule to:
- Edit: Modify timing and themes
- Delete: Remove the schedule
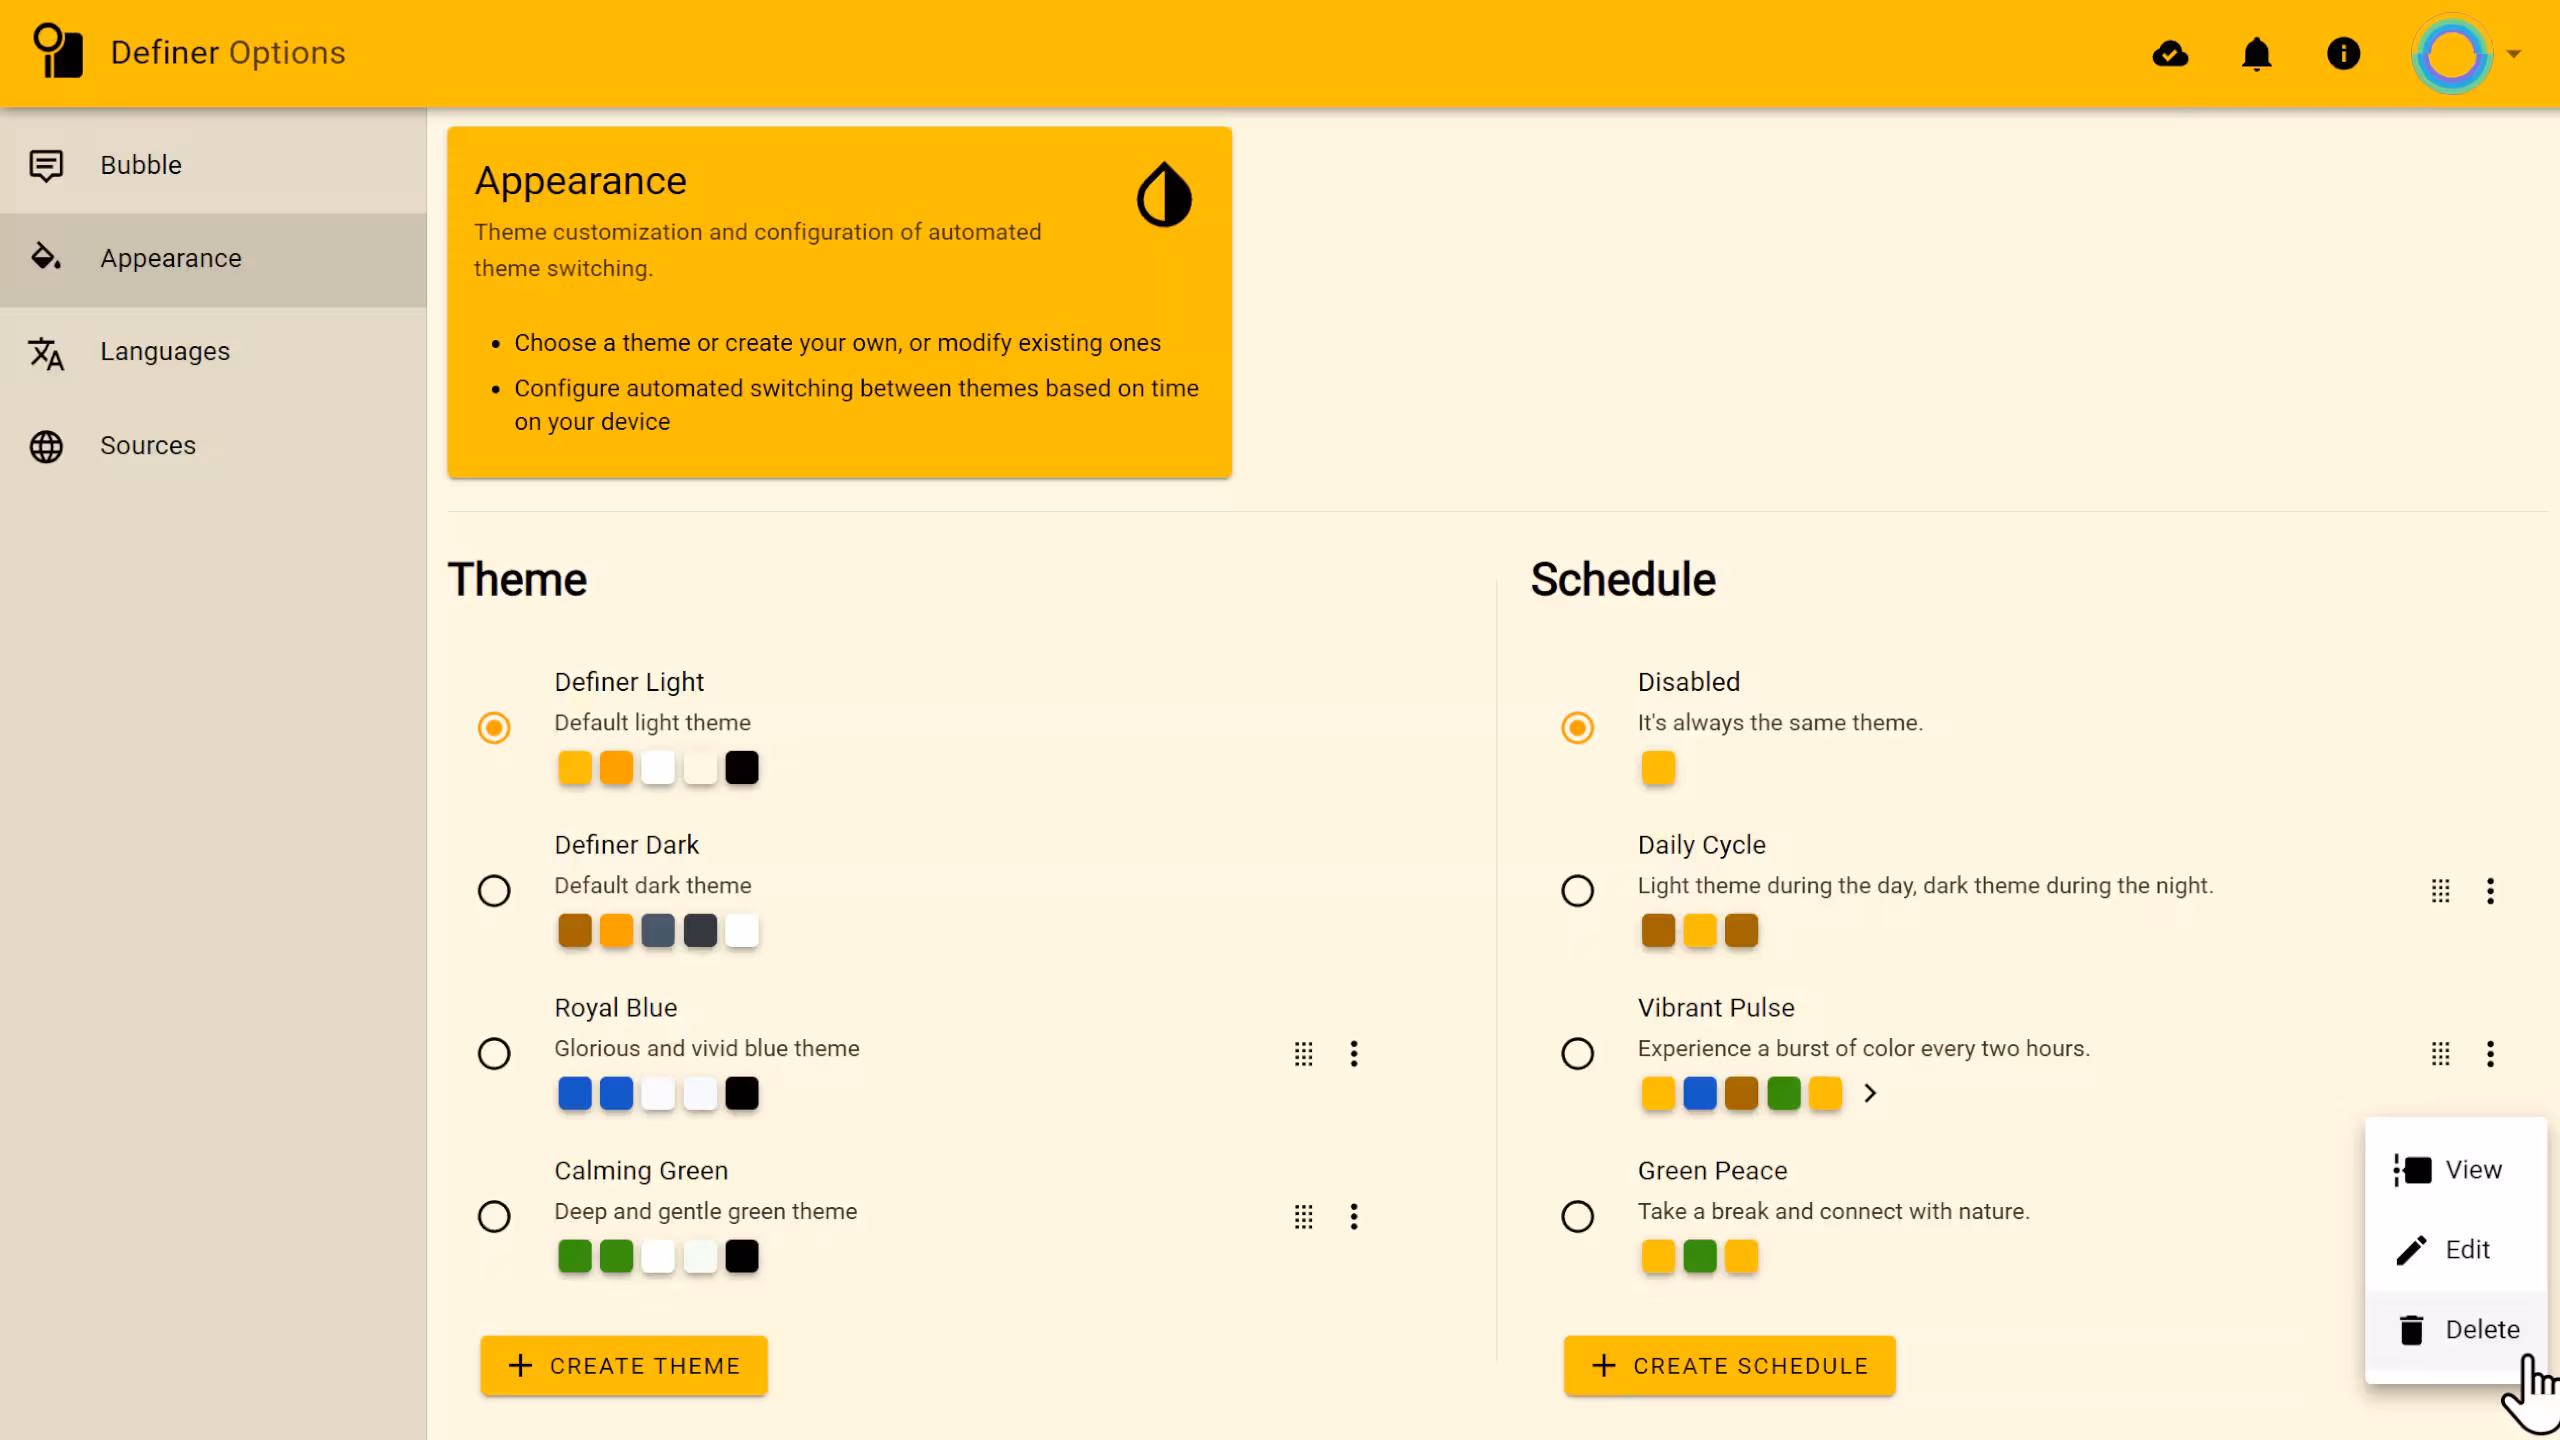 Schedule actions menu
Schedule Editor
The schedule editor consists of two tabs: Info and Timeline.
Info
Start by setting up your schedule's identity:
- Name - Give your schedule a memorable title
- Short description - A quick summary
- Full description - The complete story behind your schedule
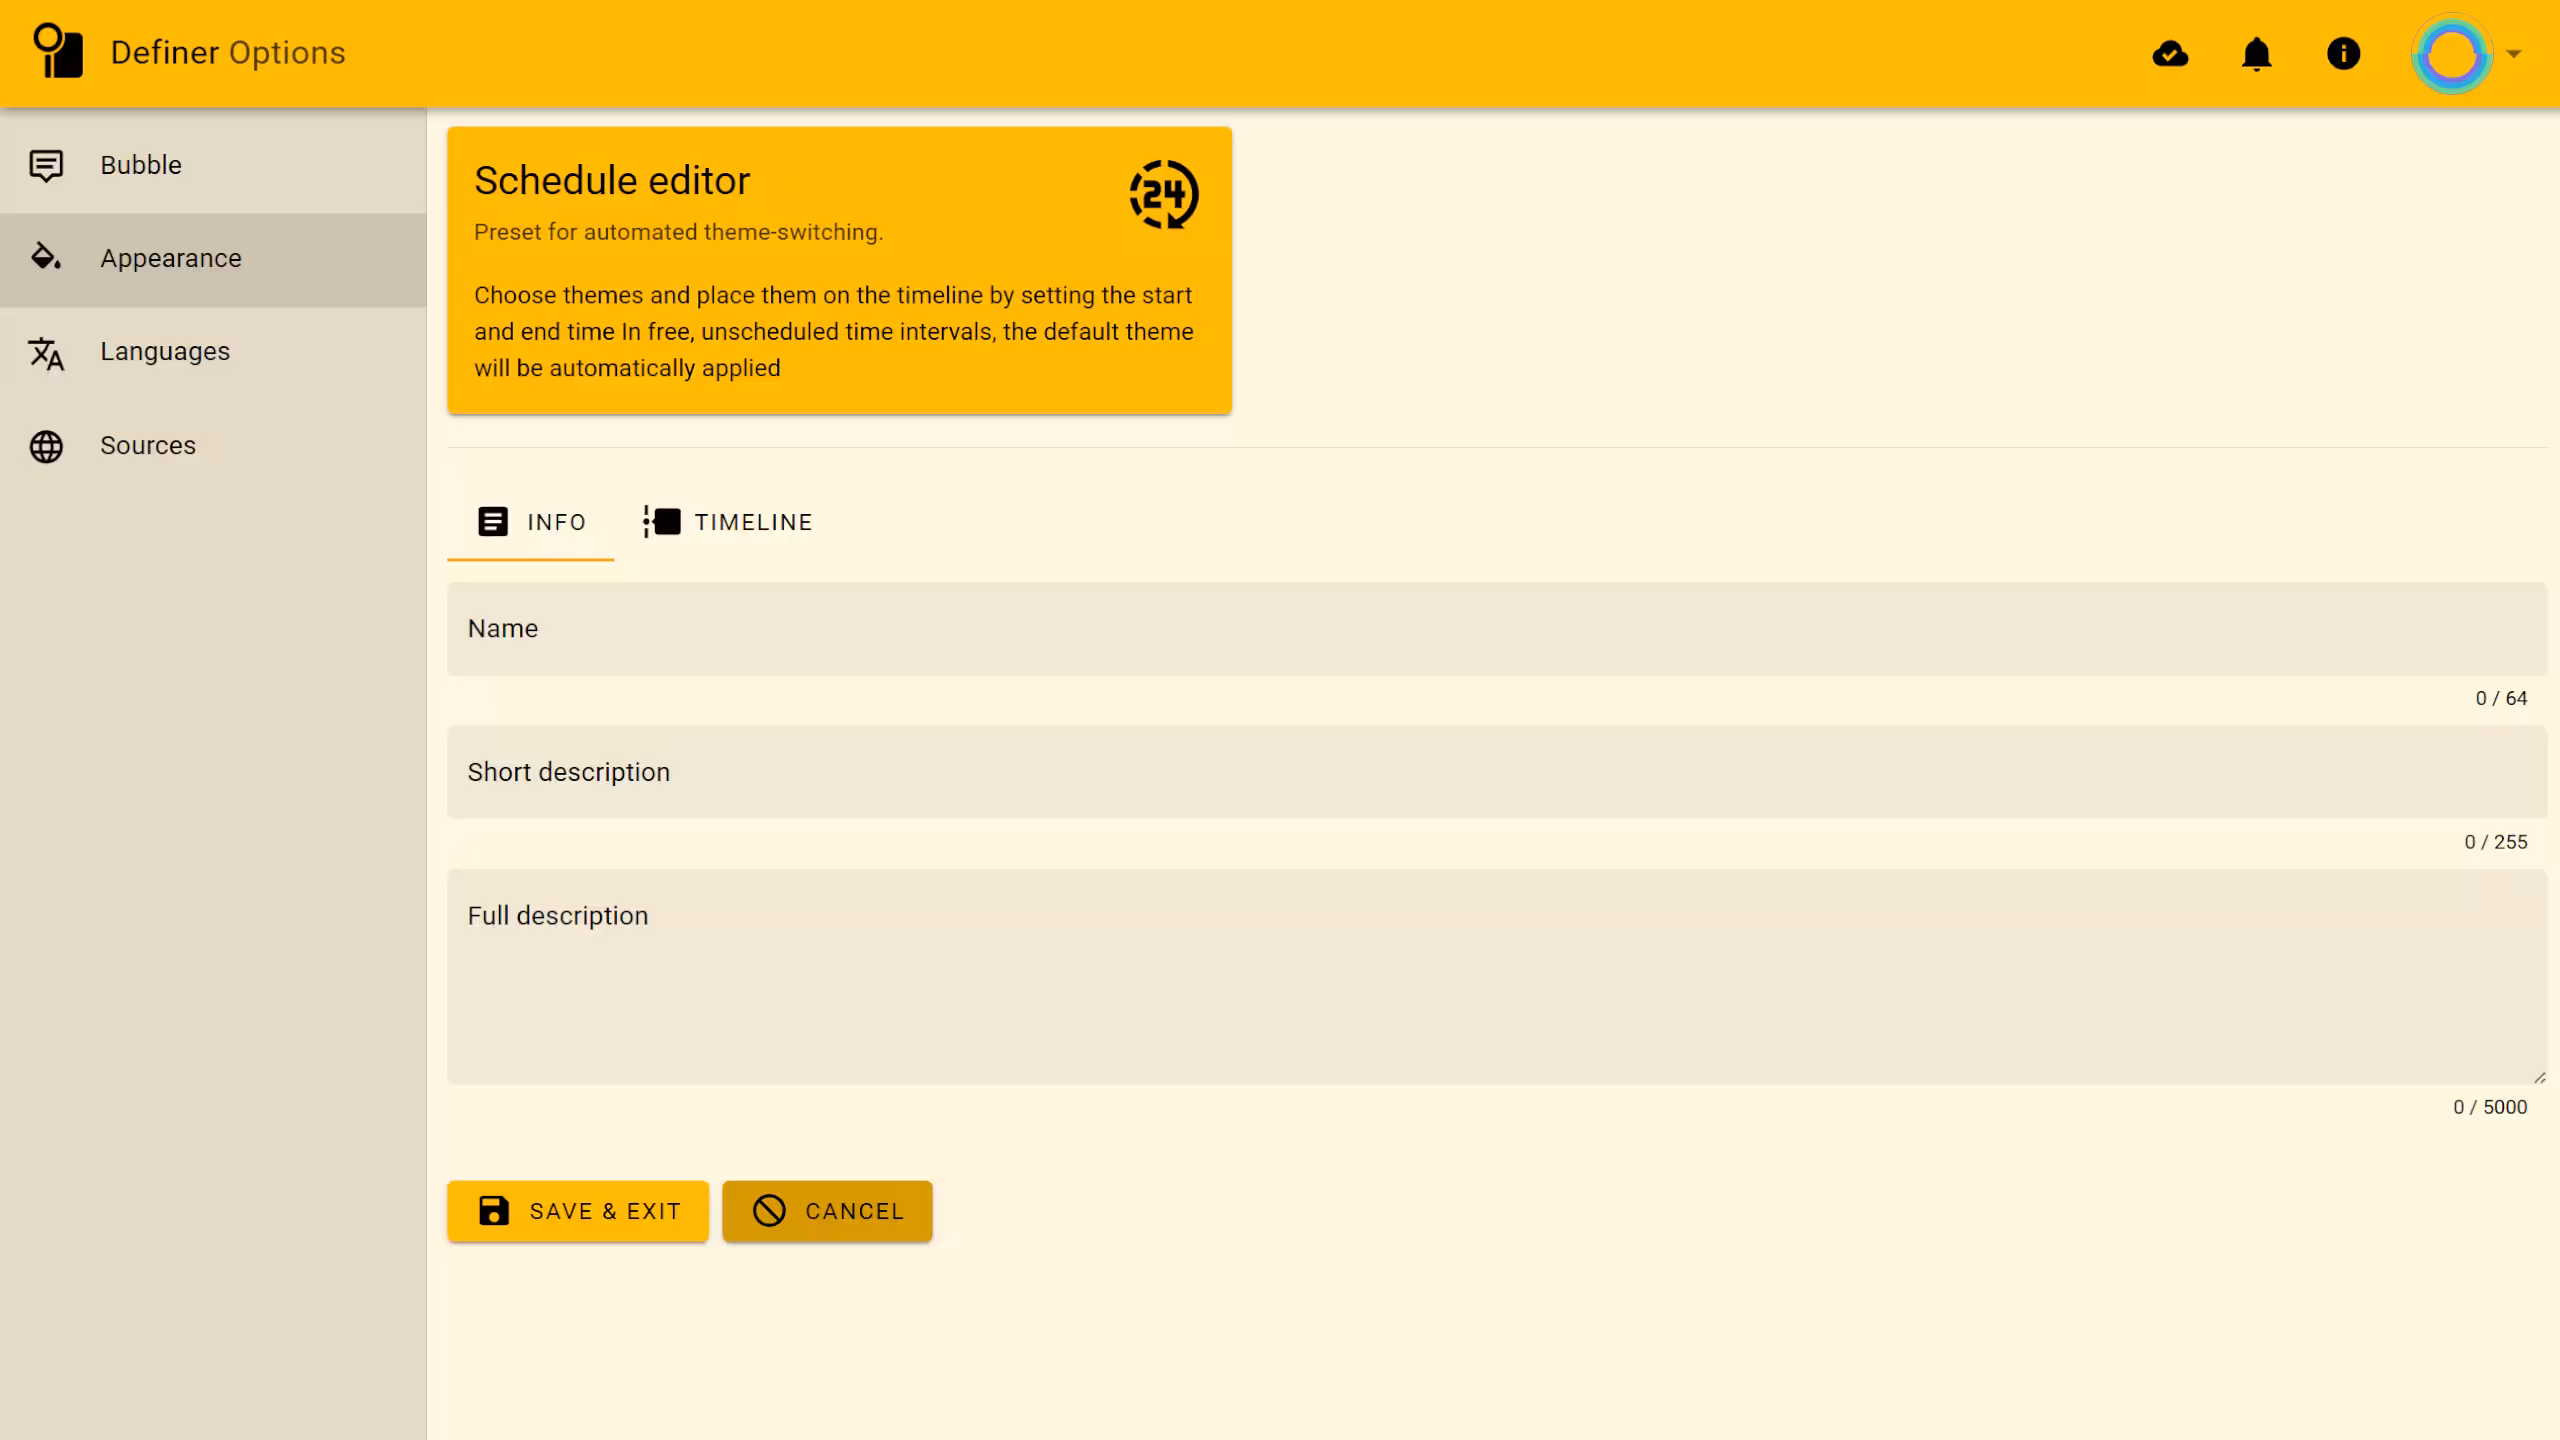 Definer's schedule editor - Info tab
Timeline
The timeline is your visual canvas for creating theme transitions throughout the day.
Understanding Periods
Your timeline starts with one period covering the full day (00:00 to 23:59). When no specific periods are set, the theme you select on the Appearance page takes over as the default.
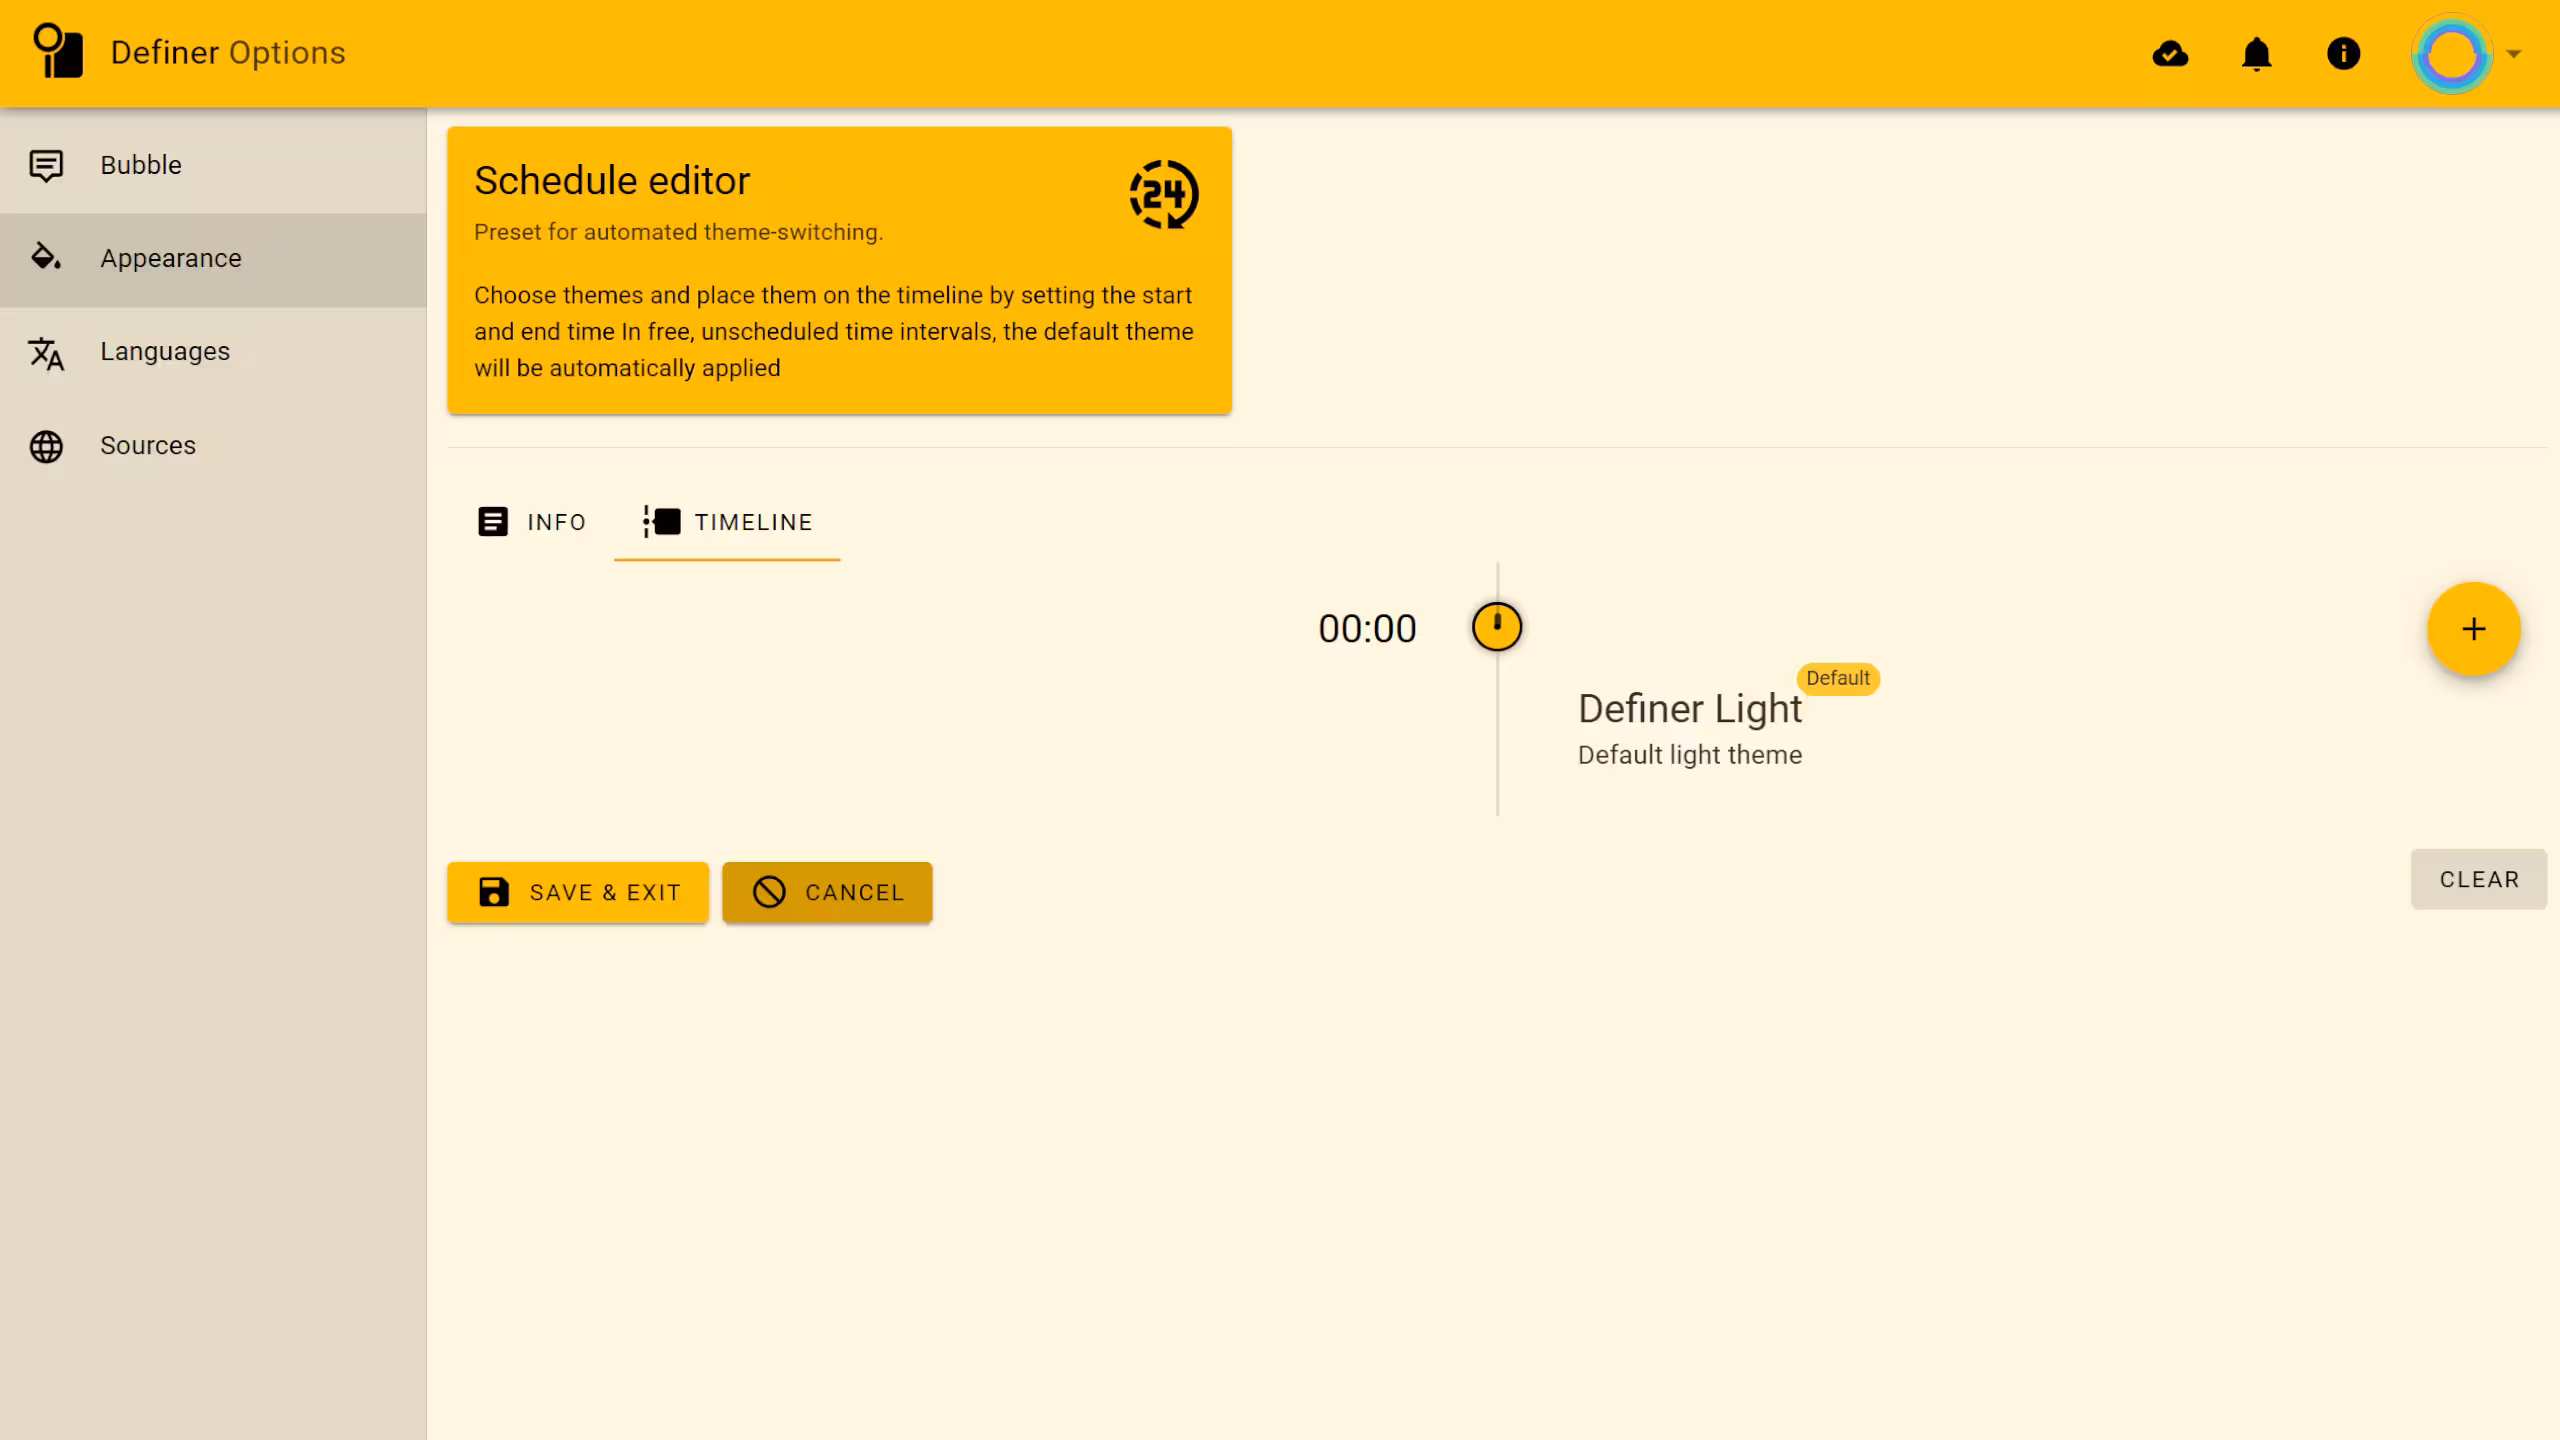 Timeline with a single default period
You can divide your day into multiple periods, each with:
- A specific start time
- An end time
- A selected theme
The periods form a continuous vertical line representing your day, with each period flowing seamlessly into the next.
Each period shows:
- The theme name
- A short description
- An analog clock showing when the theme activates
- The clock is colored with your selected theme's primary color for easy visual recognition
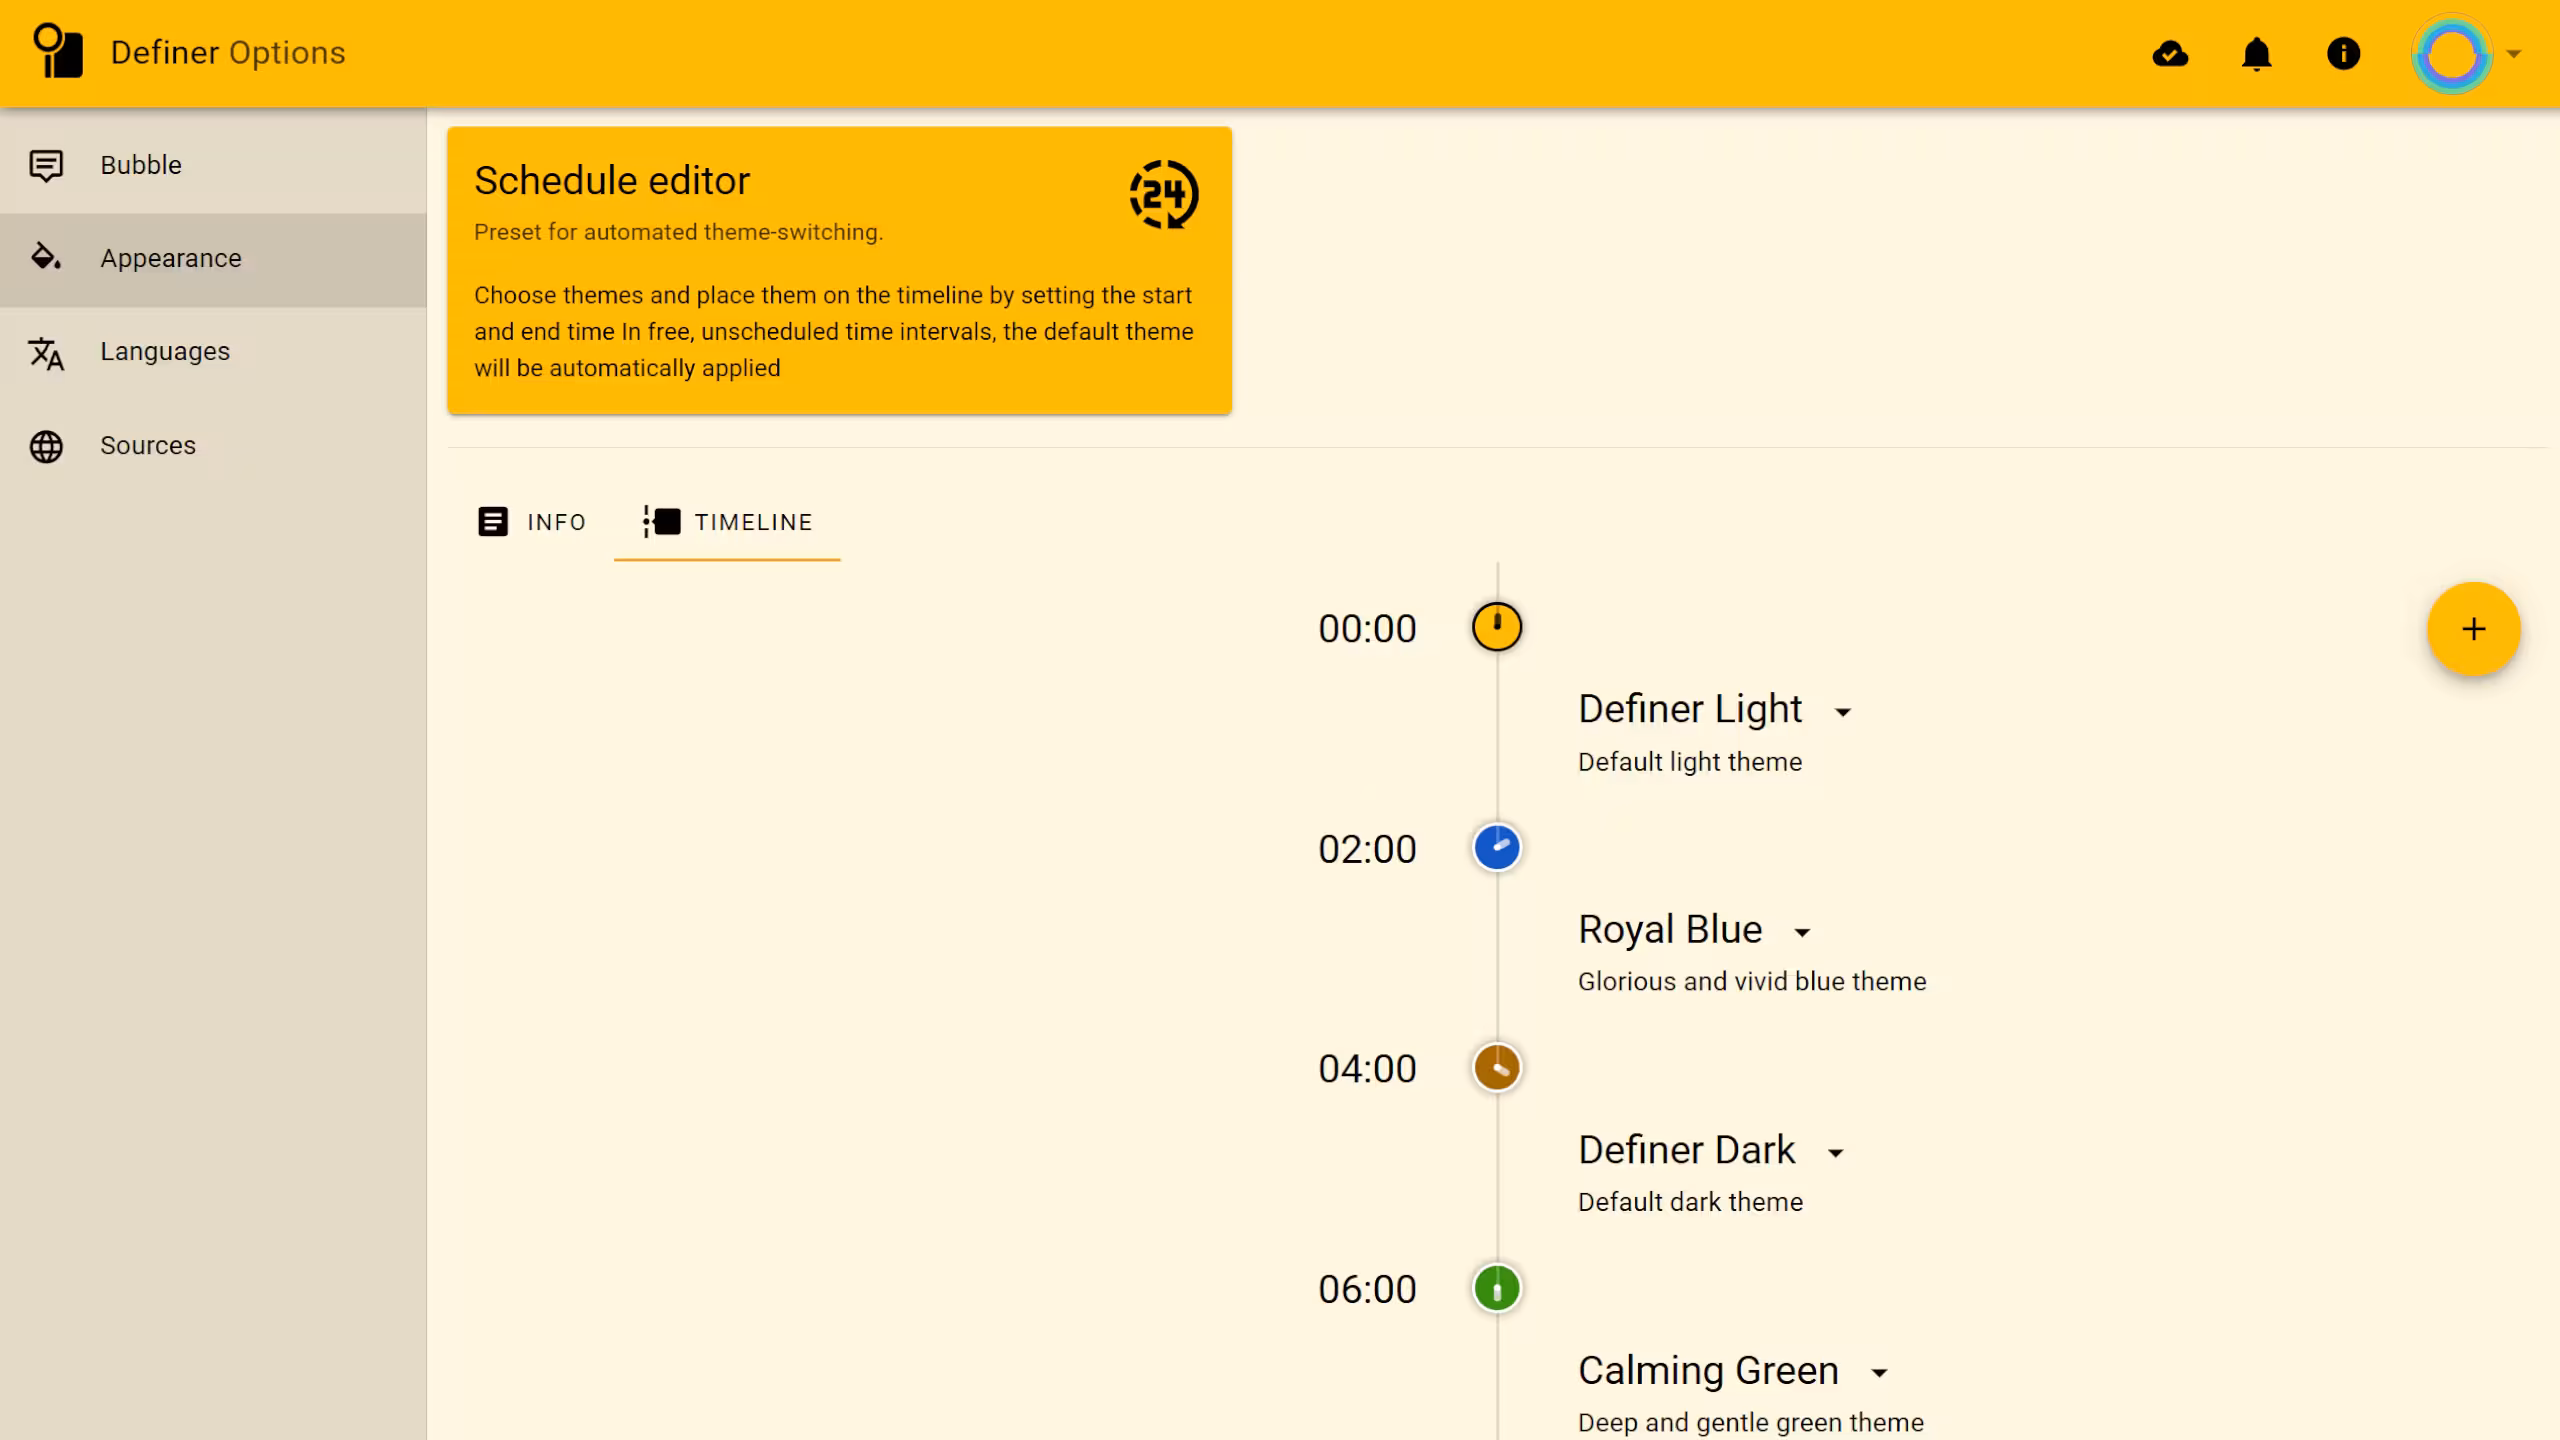 Timeline with multiple periods
This design helps you easily see how your day is divided and ensures your favorite themes shine at just the right moment.
Adding New Periods
To add a new period to your timeline:
- Click the plus icon (➕)
- Select your desired theme
- Set start and end times
- Click PLACE ON TIMELINE
The timeline automatically adjusts to accommodate your new period.
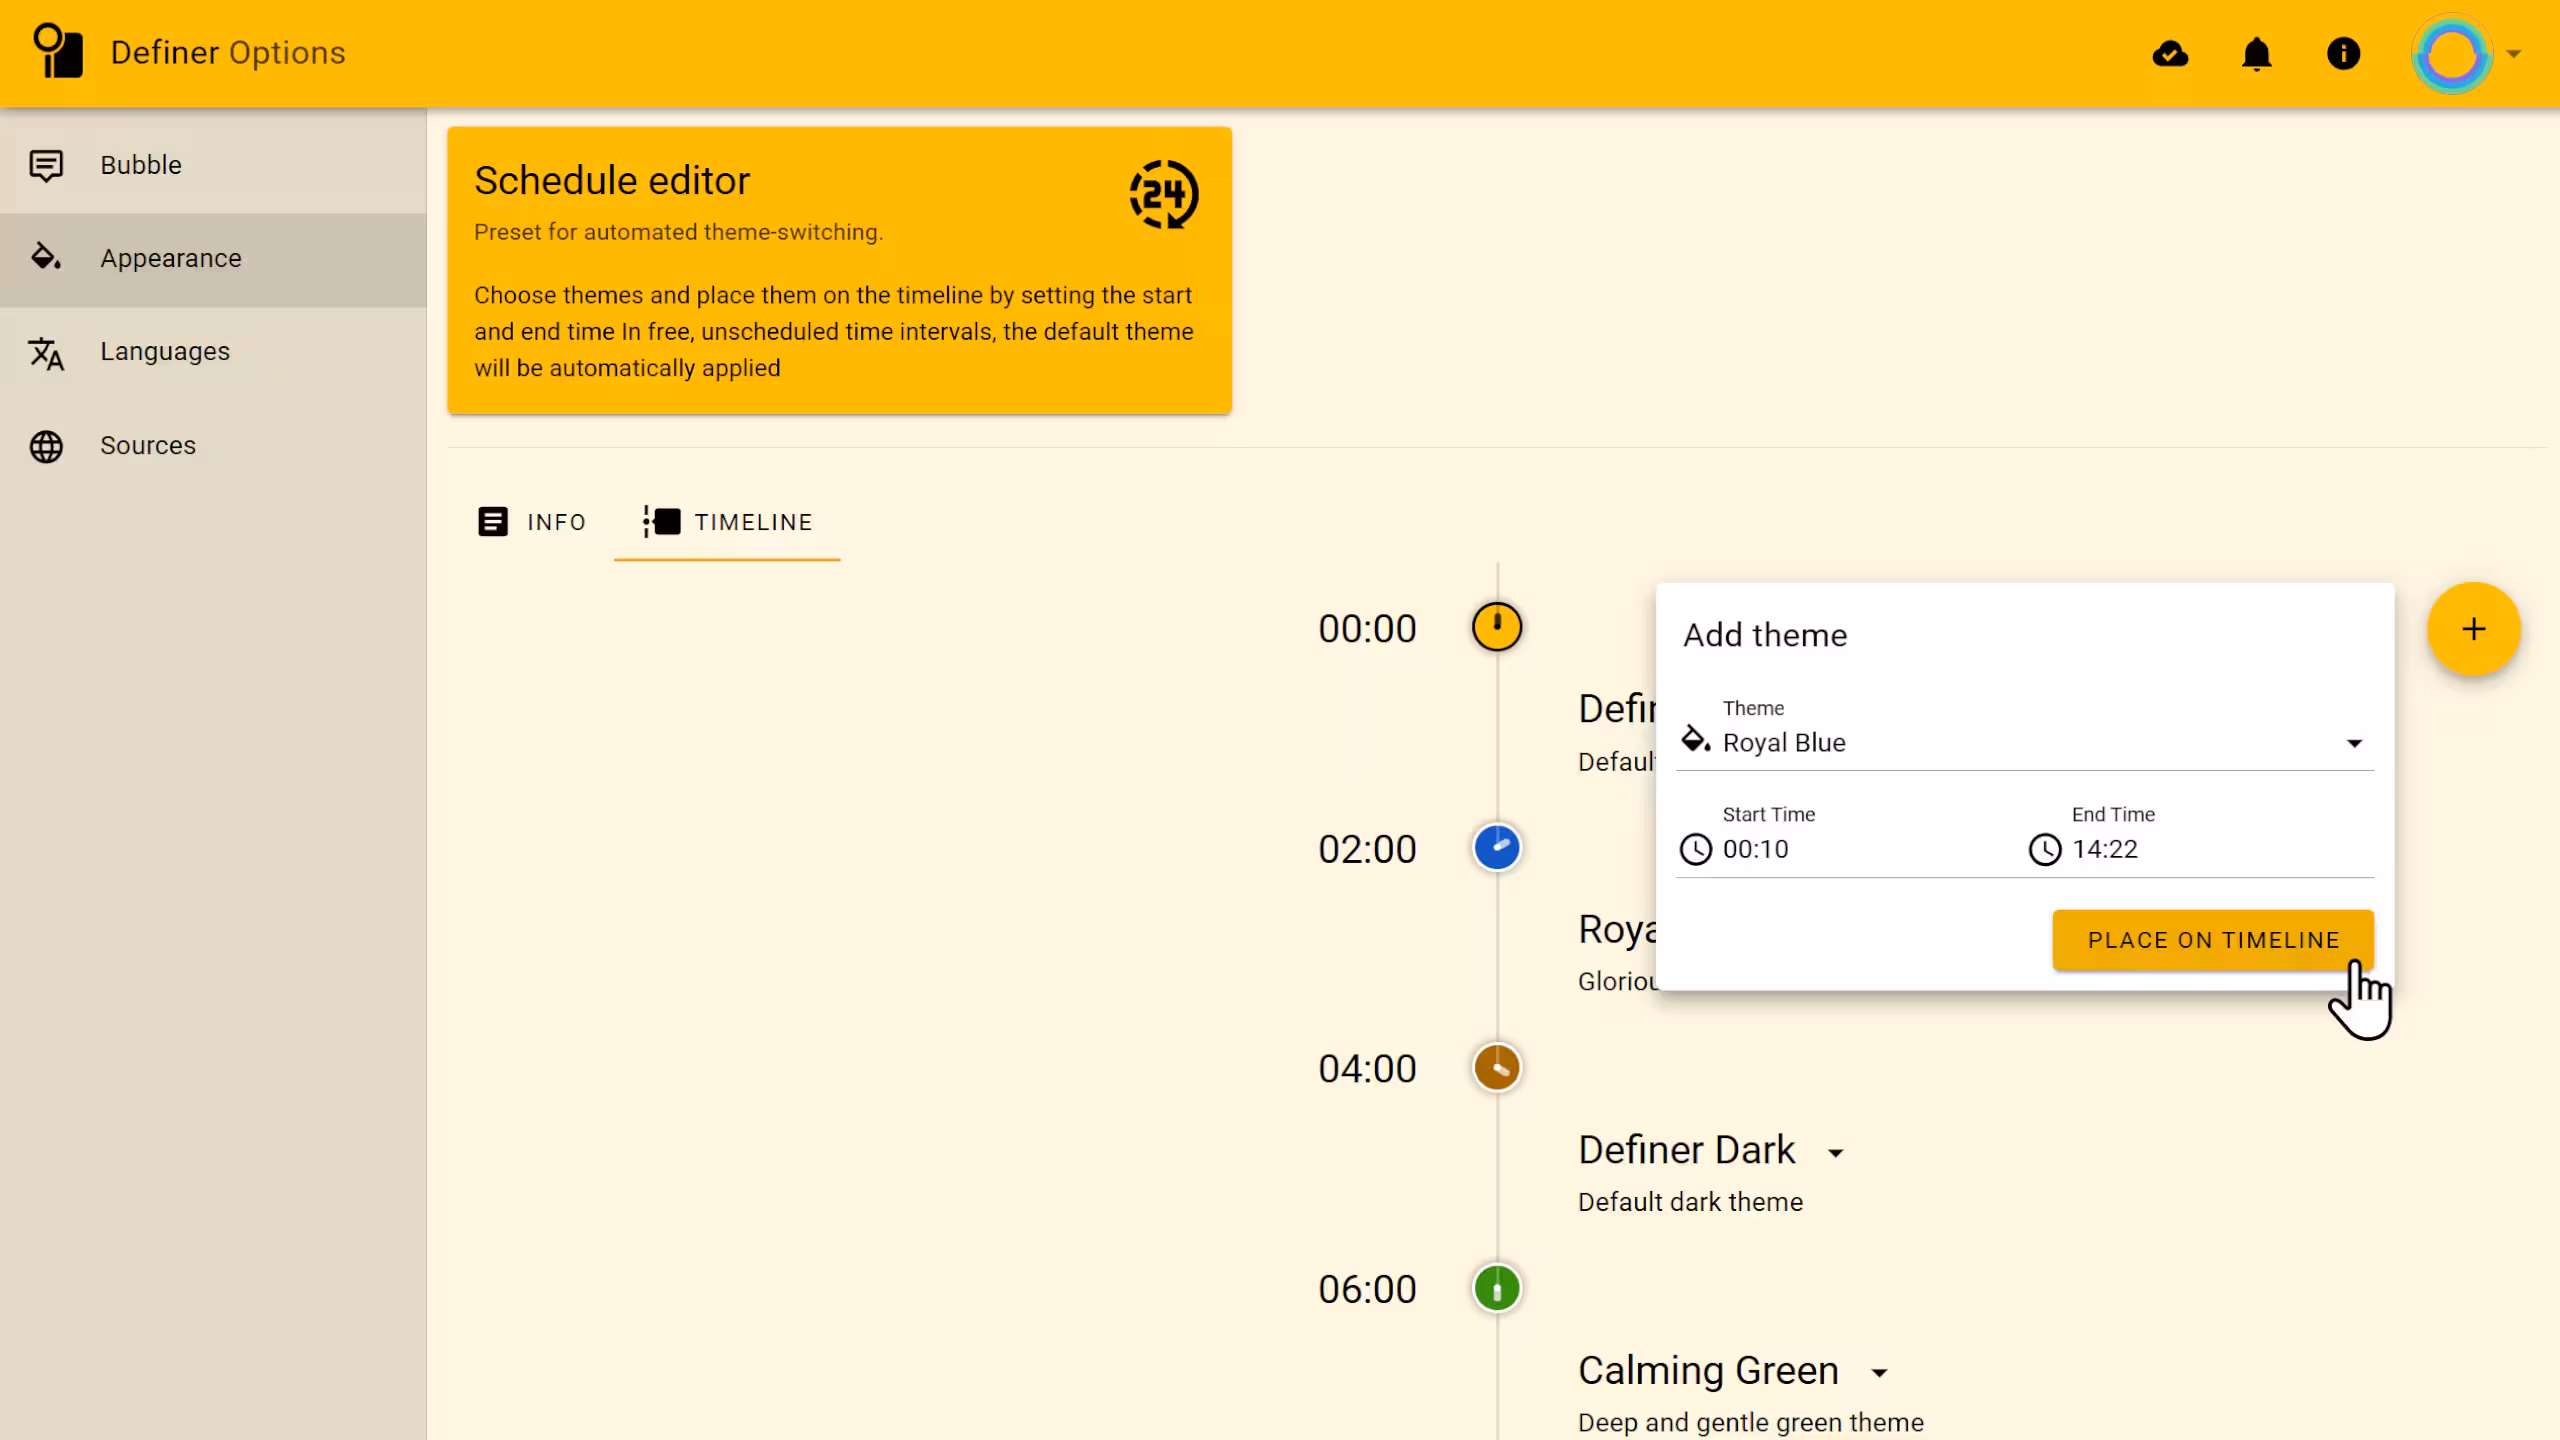 Adding a period to the timeline
Editing a Period
To modify an existing period:
- Click the down arrow (▼) next to the period
- Select Reschedule
- Change the start and end times
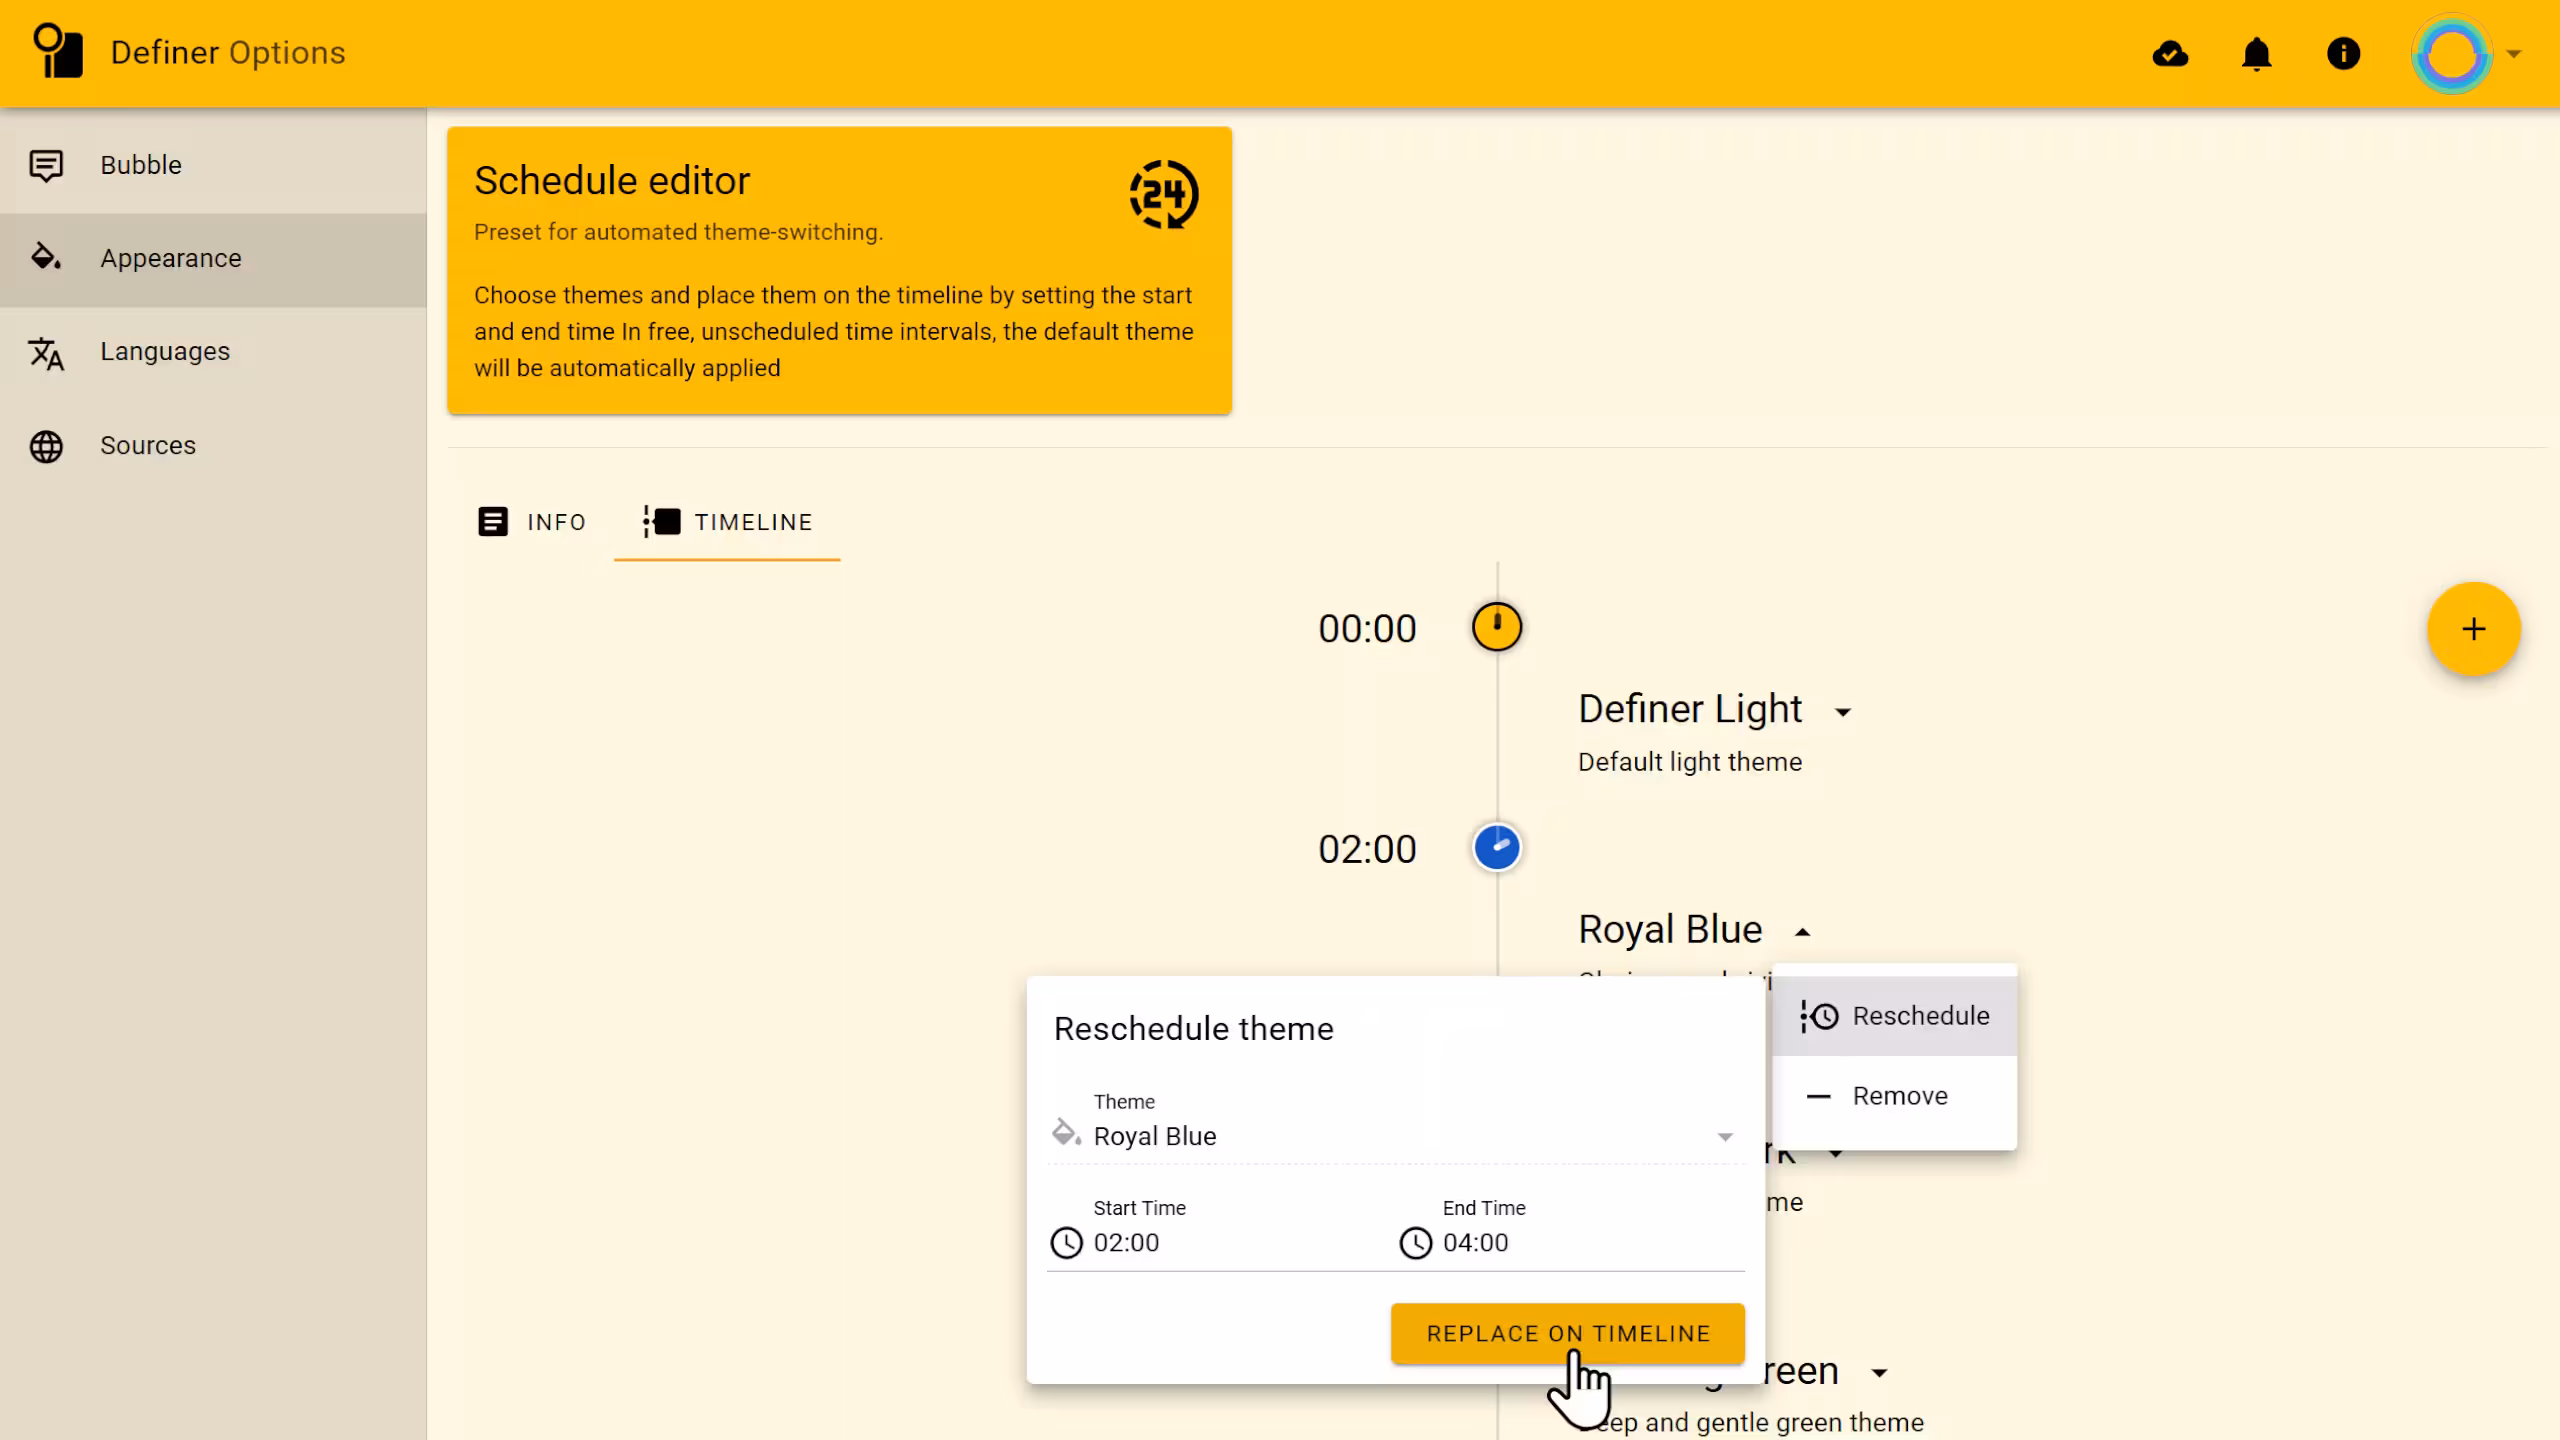 Editing a period on the timeline
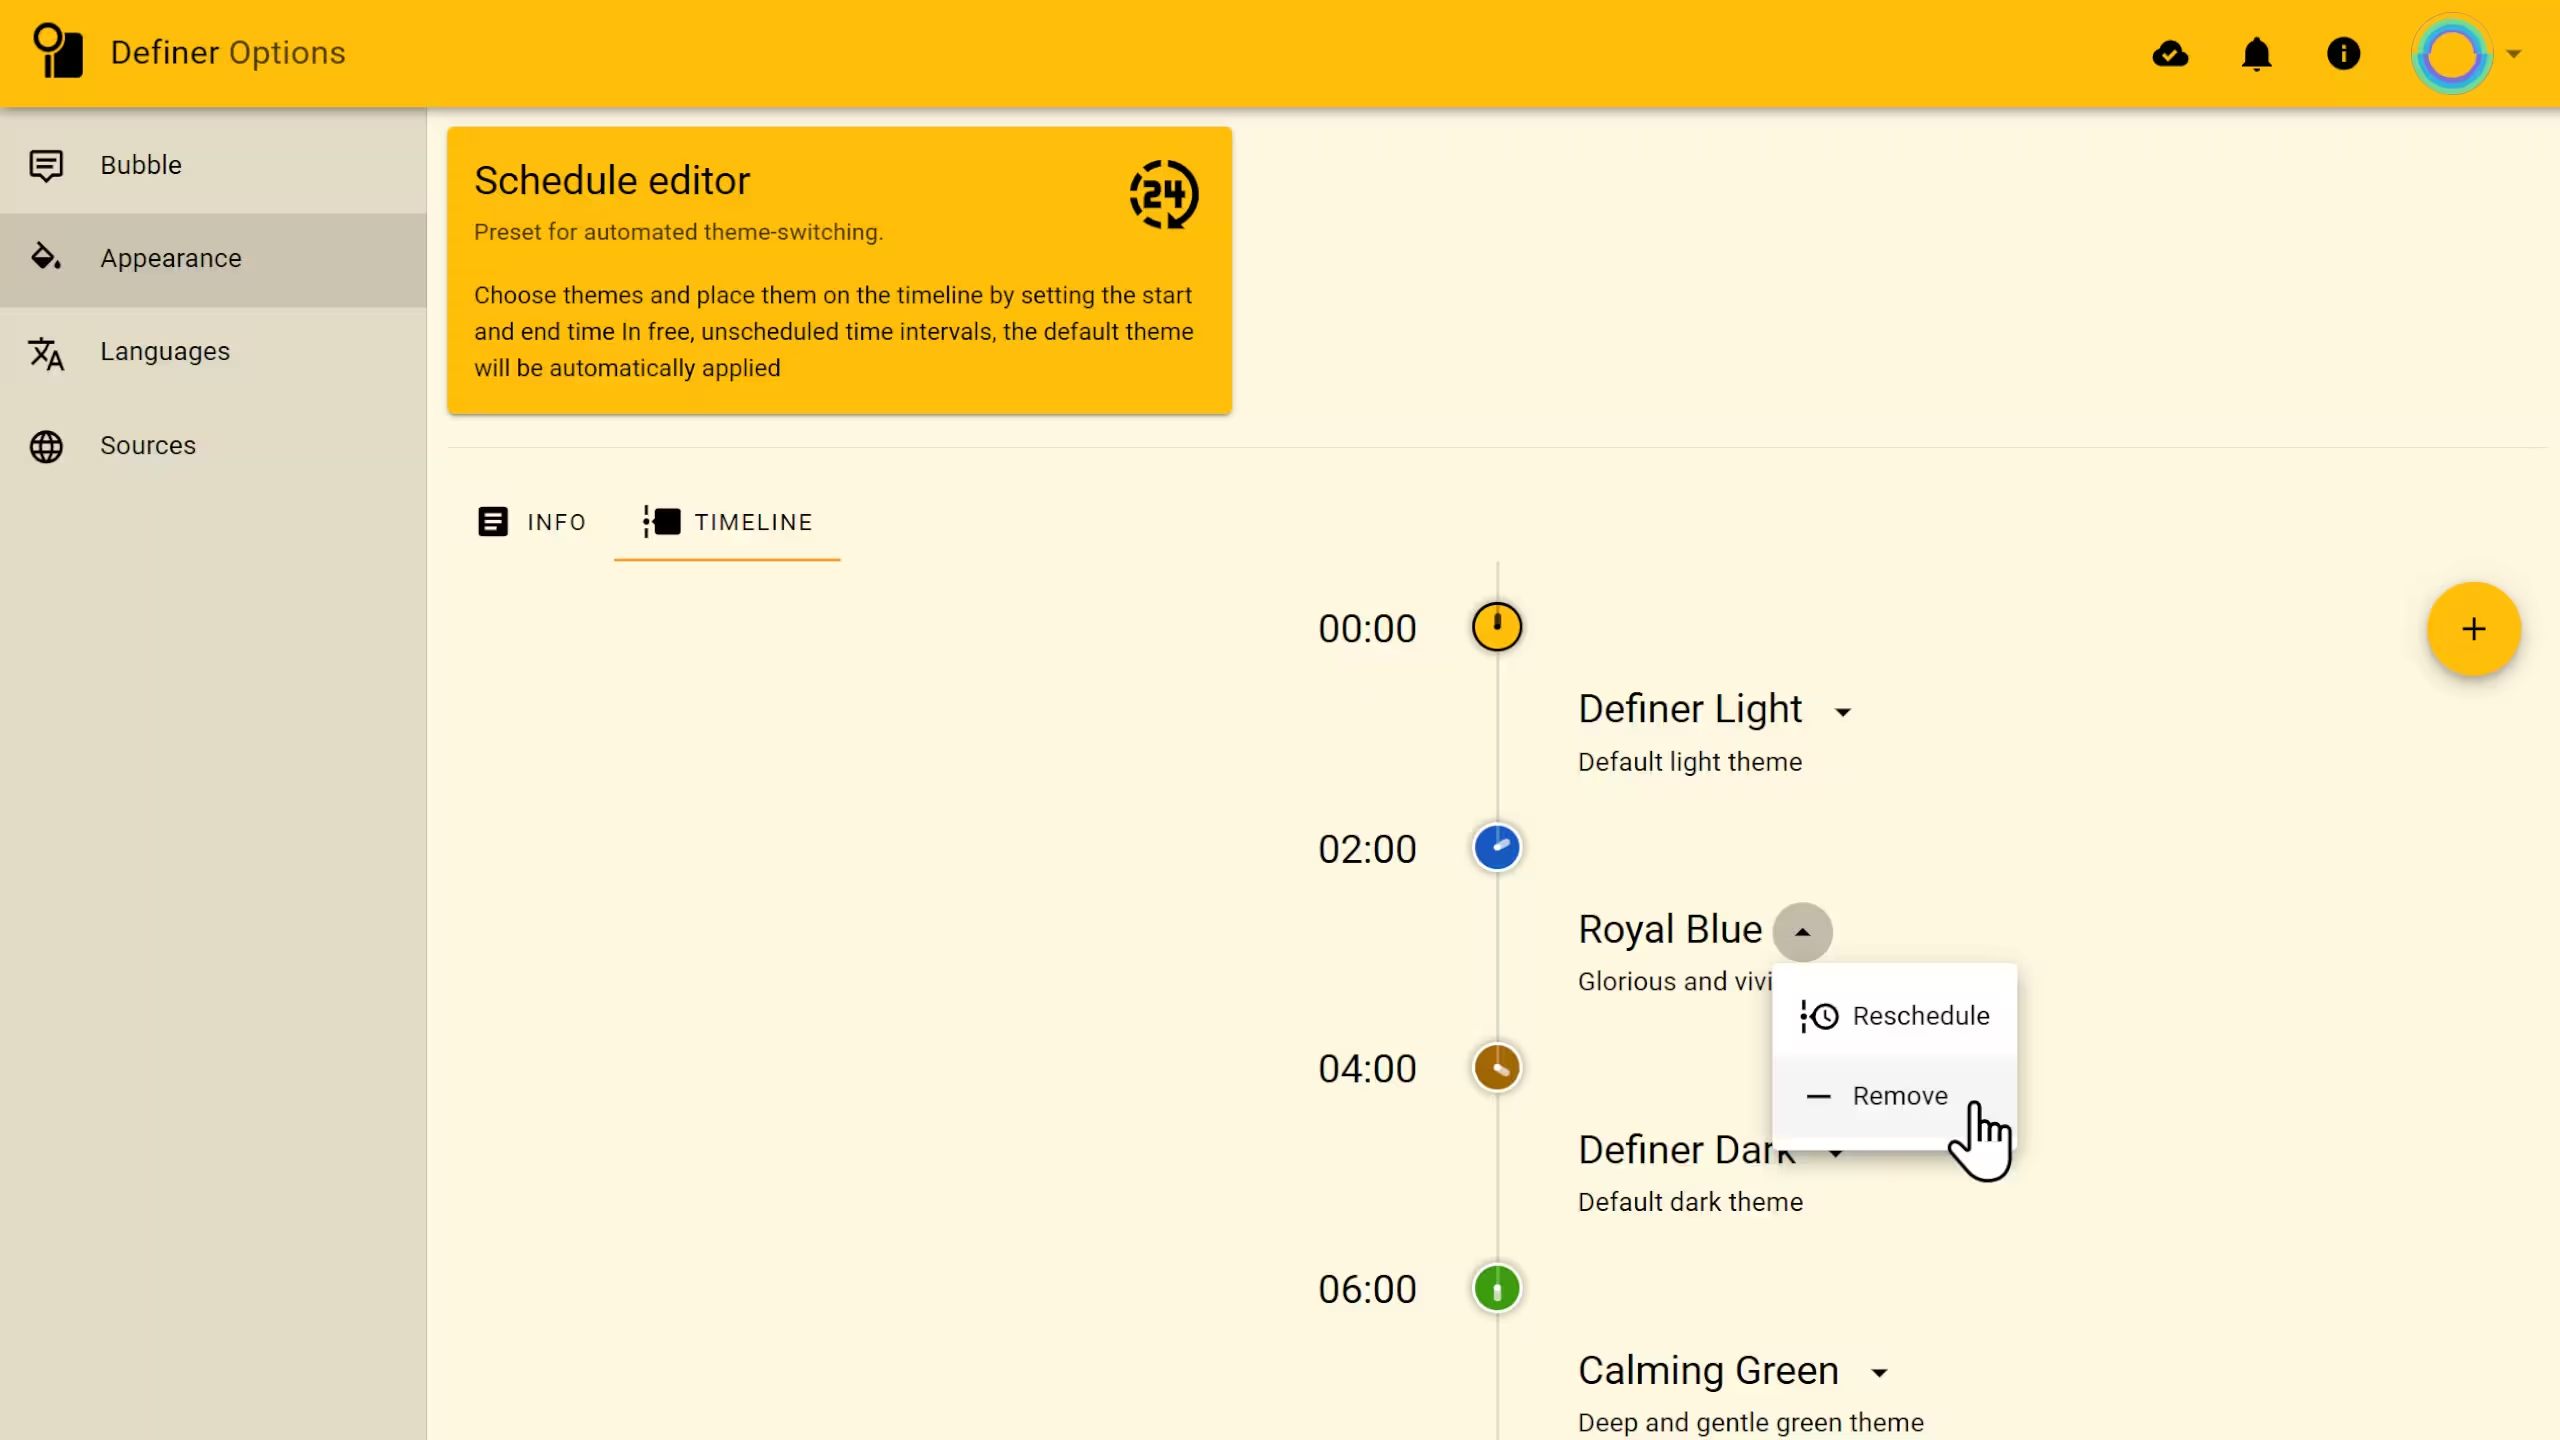
Deleting a Period
To remove a period from your timeline:
- Click the down arrow (▼) next to the period
- Select Remove
The timeline will automatically adjust to fill the gap.
Starting Fresh
If you want to completely redesign your schedule:
- Click the CLEAR button at the bottom right of the timeline tab
- This resets your timeline to a single period covering the entire day
The timeline automatically rebalances when you make changes, ensuring continuous coverage throughout your day.