Create or edit a Recipe
A Recipe controls which values from a result returned by a Source become a collection item and how those values are arranged. Visual Editor lets you make those choices in a form and check the result before saving.
The quickest way to learn the editor is to make one visible change to a built-in Recipe. You can build a blank Recipe after that. Liquid and JSON Editor are optional.
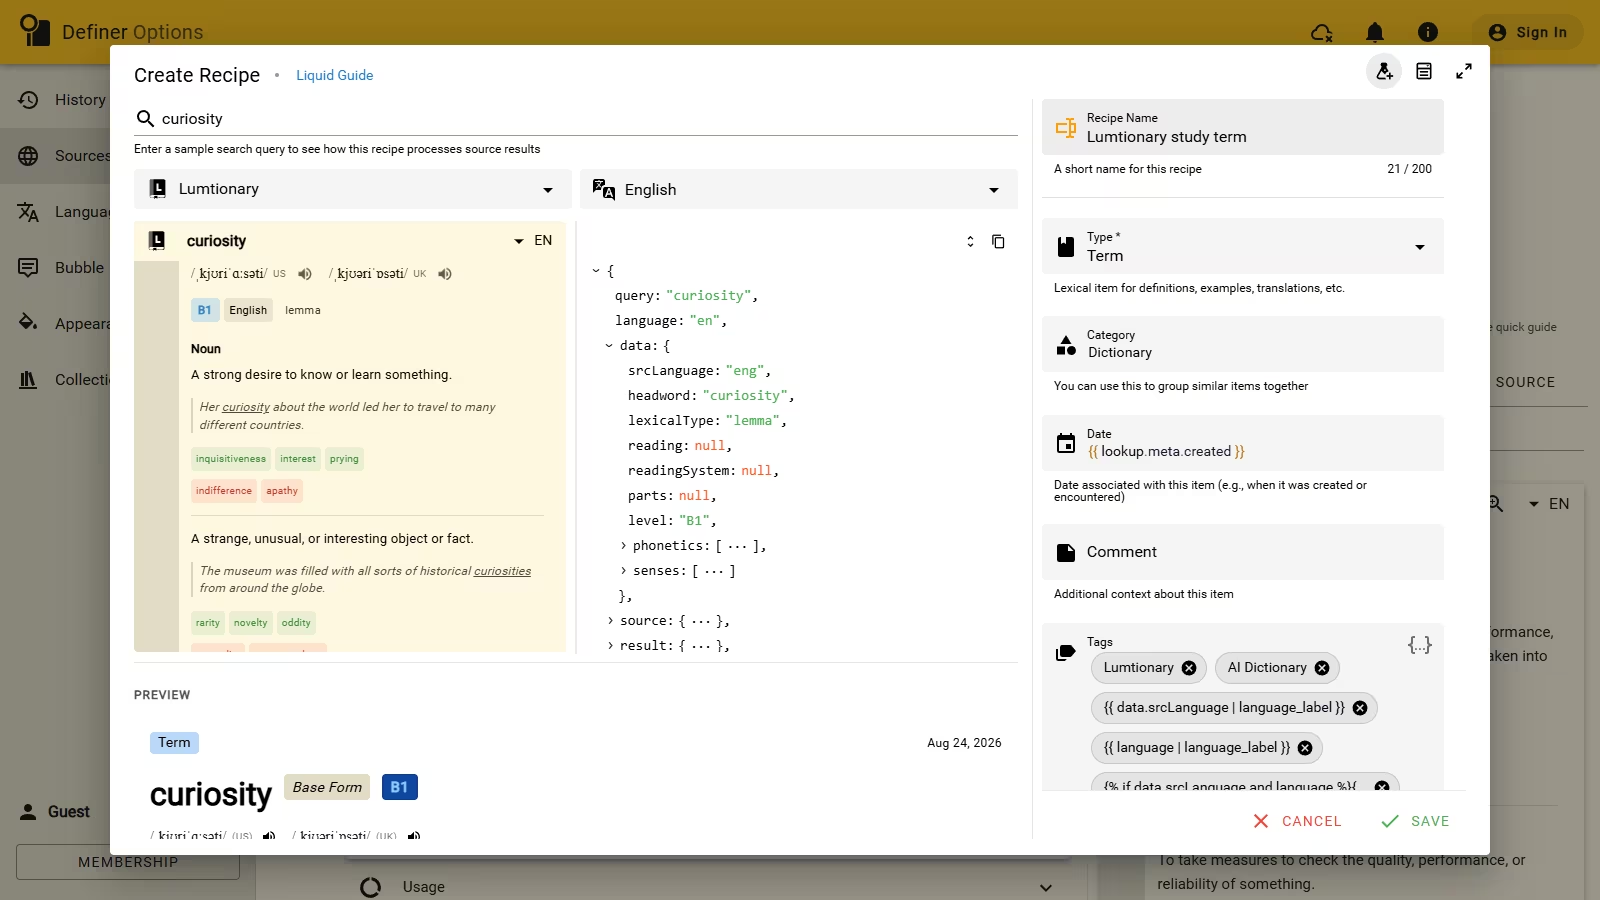
Start from a built-in Recipe
Built-in Recipes cannot be changed in place, but you can use one as the starting point for an Embedded Recipe. This path is available from the Source that owns the Recipe and does not require the separate Global Recipes library.
Make an editable copy
- Open Definer Options → Sources → Lumtionary → Settings → Recipes and select Create Recipe.
- Select the flask-plus Use existing recipe icon in the editor header, then choose Lumtionary Term.
- Change Recipe Name to
Lumtionary study term. - Add
studyto Tags. Confirm thatstudyappears in Preview. - Select Save. The built-in remains unchanged, and Lumtionary study term appears under the Lumtionary Source's Embedded Recipes.
Try the copied Recipe
If you do not see Choose Recipes, turn on the Recipe picker before testing the copy.
- Look up
curiosityand open its Lumtionary result. - Open Choose Recipes, select Lumtionary study term, and select Save selected (1).
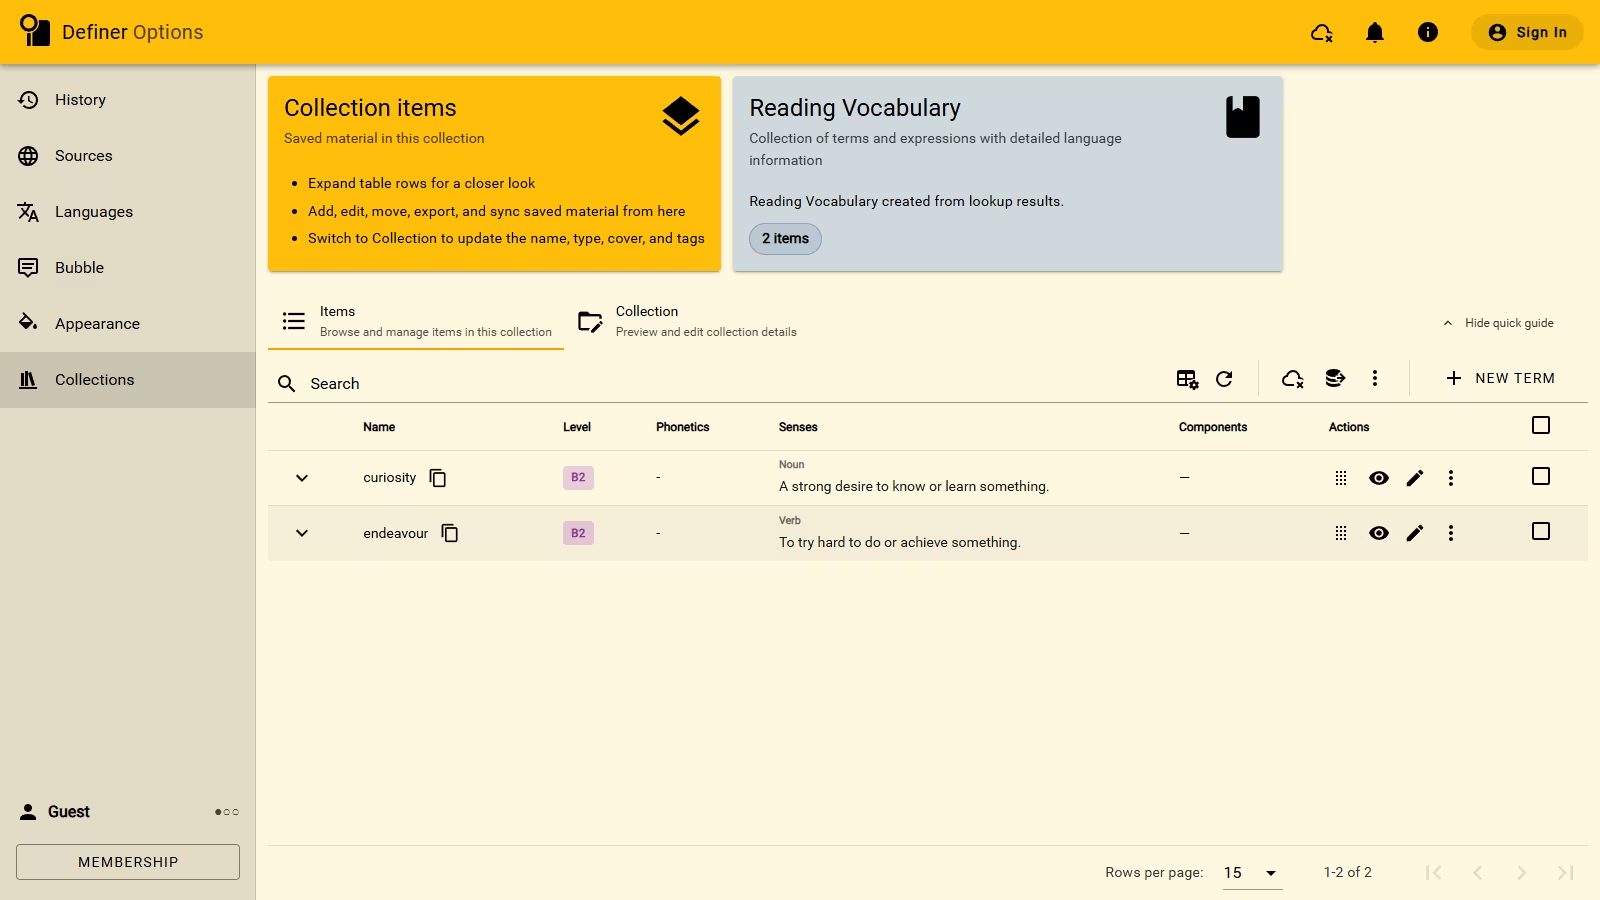
- Open Export → Saves. The new Term should be first and should include the
studytag.
Create a blank Recipe
First, choose where the Recipe should belong:
- An Embedded Recipe belongs only to one configured Source. Create one from Definer Options → Sources → [Source] → Settings → Recipes → Create Recipe. The editor already knows its Source.
- A Global Recipe can be reused with results from any Source that matches its Source setting. The Global Recipes library is included with membership. Create one from Definer Options → History → Recipes → New Recipe. On a narrow layout, New Recipe may appear as a plus button.
The example below uses Lumtionary. Start from its Embedded Recipe route, or create it as a Global Recipe when the Global Recipes library is available to you.
Build a Lumtionary study Card in Visual Editor
A mapping is the text or template that fills one field in the created item. In this example, the Front and Back mappings use small Liquid expressions to take the changing headword and first definition from each Lumtionary result.
Build and save it
Enter Recipe Name
Lumtionary study card. For a Global Recipe, choose Lumtionary under Source. Choose Card under Type.Open Content and enter this Front mapping:
liquid{{ data.headword | default: query }}Enter this Back mapping:
liquid{{ data.senses[0].definition }}Enter
curiosityin Query. Confirm that Preview shows the headword on the front and its first definition on the back.Select Save.
Try the new Recipe
If Choose Recipes is not available, turn on the Recipe picker before testing the new Recipe.
- From a live Lumtionary result, open Choose Recipes and select Lumtionary study card.
- Select Save selected (1).
- Open Export → Saves and confirm that the new Card contains the expected headword and definition.
The Liquid expressions tell Definer where to find the changing headword and definition. The Liquid article explains how to find other values and transform them.
Choose another output Type
The Type determines the fields available in Visual Editor and the shape of the item it creates.
| Type | Use it to create |
|---|---|
| Raw | Flexible JSON data |
| Term | Dictionary-style details such as senses, usage, and pronunciation |
| Card | A front-and-back item for review or Anki |
| Note | Titled, free-form content |
| Prompt | A reusable AI prompt and its settings |
Edit a custom Recipe
Open the Recipe from the place where it belongs:
- Global: Definer Options → History → Recipes → [Recipe] → Edit.
- Embedded: Definer Options → Sources → [Source] → Settings → Recipes → [Recipe] → Edit.
Change the intended fields, check Preview, and select Save. Then choose the Recipe for a save from a matching source result and use Export → Saves to check the new item.
Edit the output template as JSON
JSON Editor lets you edit the output Type and its mappings as one JSON value. It can show mappings that Visual Editor does not display for the selected Type. Preview follows the selected Type, so concentrate on the mappings used by that output.
Recipe Name stays above the editor. A Global Recipe also keeps its Source there. An Embedded Recipe is already tied to its Source, so there is no Source choice in its editor.
- Open a custom Recipe. In the top-right corner of the editor, select the current mode icon (a form for Visual Editor), then select JSON Editor. The icon changes to braces in JSON mode.
- Change the intended Type or mapping. Keep the complete JSON value valid.
- If validation marks the JSON as invalid, fix the highlighted syntax or switch back to Visual Editor without saving the broken version.
- Check Preview and select Save.
- Choose the Recipe for a save from a matching source result, then use Export → Saves to verify the created item.