Create and edit a Routine
The Visual Editor lets you build a Routine while viewing a live source result beside it. This walkthrough collects a visible heading, shows the collected value, saves the Routine, and reopens it. You can use the same workflow for any source that supports Routines and shows a heading in its result.
Start an empty Routine
Open Definer Options → Sources → [source] → Settings → Routines.
Select Create Routine. The walkthrough below starts with this empty Routine, so its first Step is safe to change.
NOTE
If Create Routine opens an account or membership prompt, this source has reached its current Routine limit. Follow the prompt, or edit or remove an existing Routine.
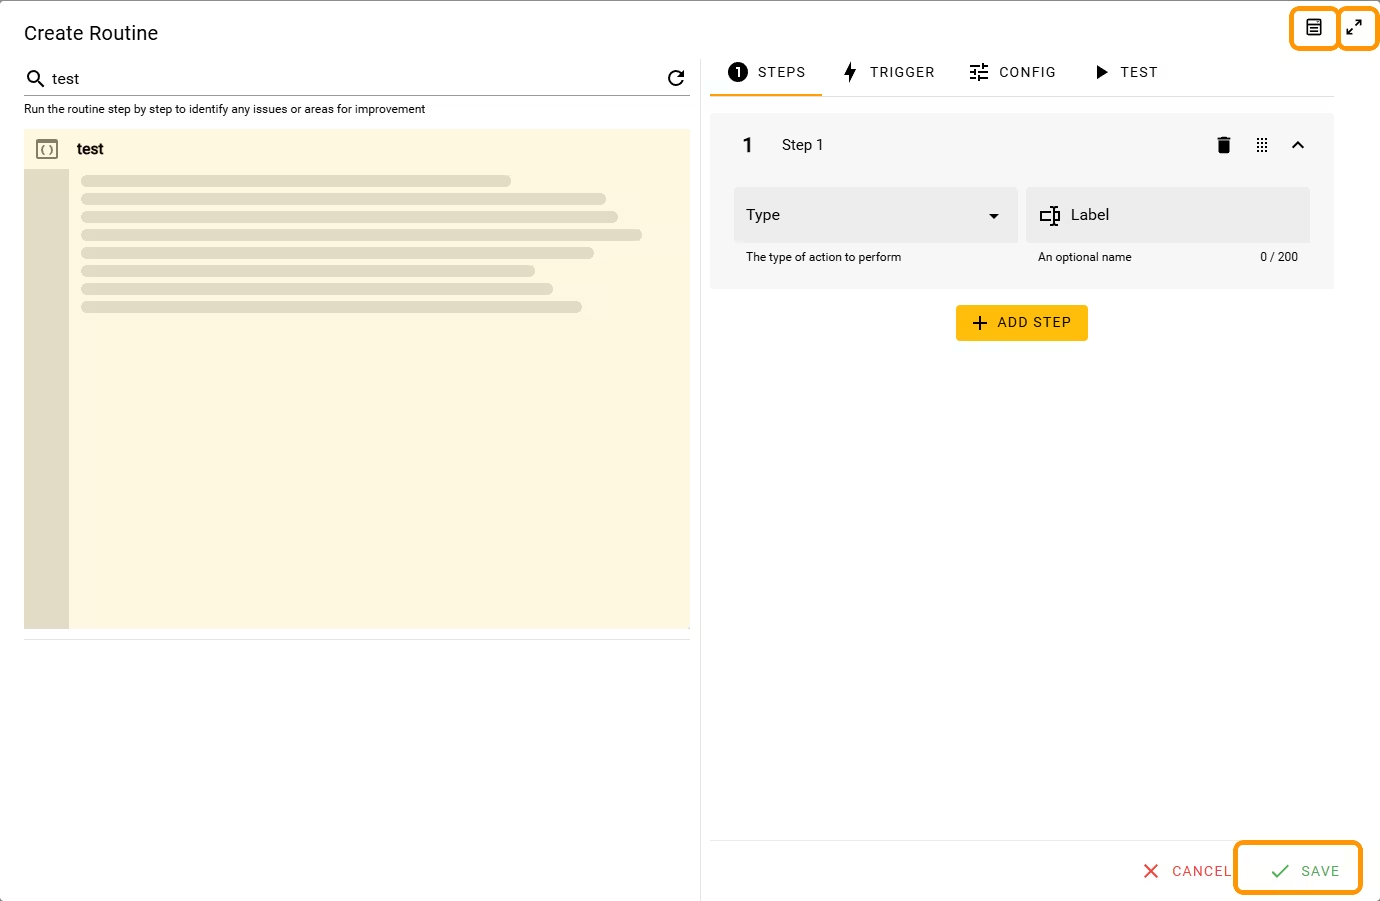
The editor has a source-result preview on the left and the Routine settings on the right. The Visual Editor is organized into Steps, Trigger, Config, and Test. Use the mode menu near the upper-right corner to switch between Visual Editor and JSON Editor.
Load a result to work with
Enter a representative lookup in the query field above the preview. Wait until the source result shows a heading you can recognize.
The preview is your working copy of the result. Use the refresh button beside the query if the page needs to load again.
Collect the heading
A Step is one action in the Routine. Steps run from top to bottom. Extract is the Step that reads a value from a page element.
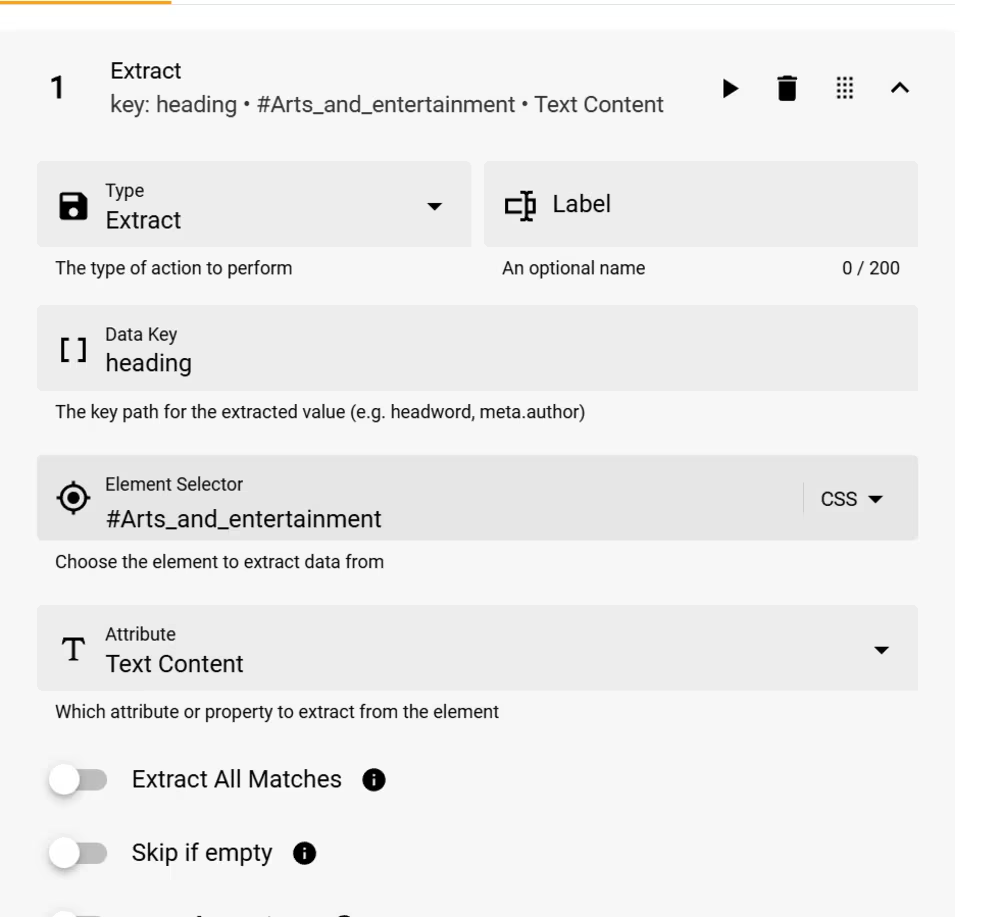
- Open the first Step and choose Extract under Type.
- Enter
headingunder Data Key. A Step's Data Key is the name Definer gives the collected value. - Select the crosshair button in the selector field, then select the heading in the preview.
- Keep Text Content selected under Attribute.
The selector field now identifies the heading you picked. You do not need to write a CSS selector for this first Routine.
Test the collected value
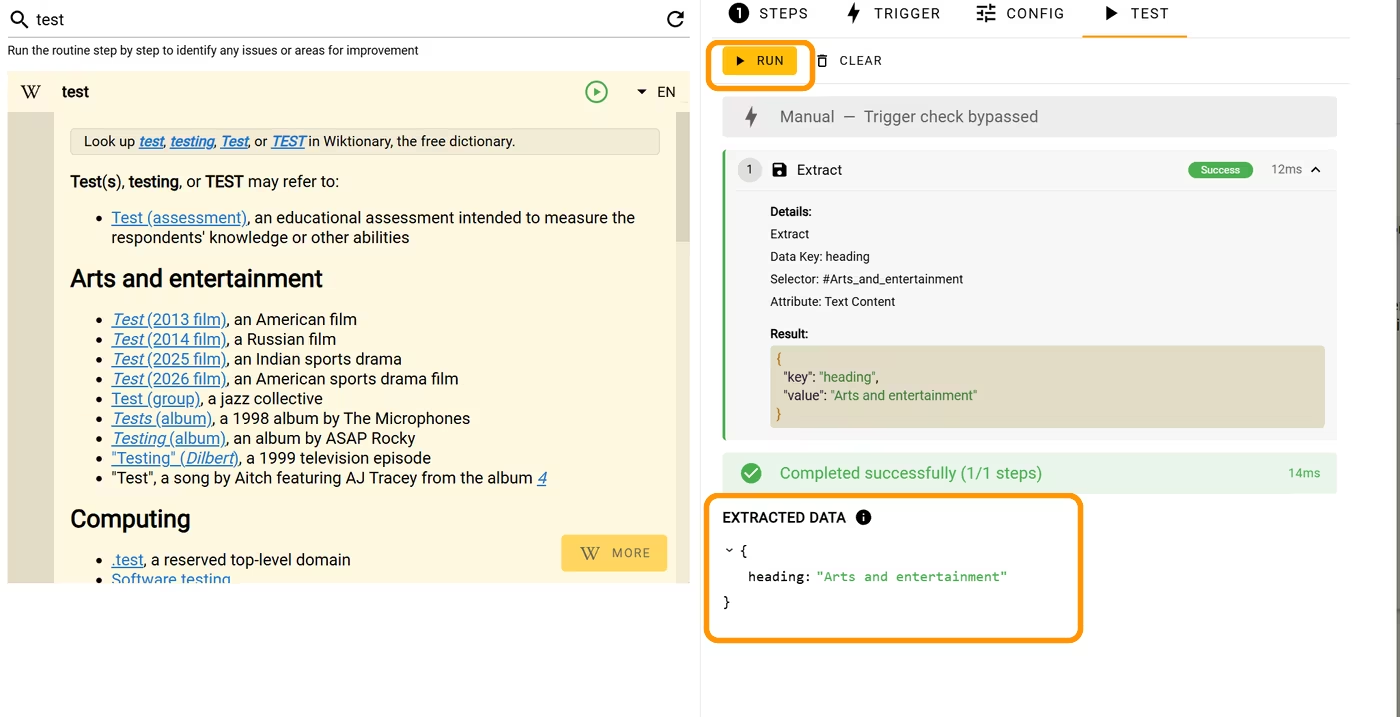
Select Test run this step in the Step header to test only that Step. A successful result shows the collected heading in the Step result.
Then open Test and select Run to test the complete Routine. Under Extracted Data, confirm that heading contains the text you selected.
If the value is empty or the Step reports that it cannot find the element, return to Steps and pick the heading again. See Test and troubleshoot Routines for more recovery steps.
Name and save the Routine
- Open Config.
- Enter a short Name, such as
Collect heading. - Add an optional Description that says which page value the Routine collects.
- Select Save.
The editor closes, and the named Routine appears in the source's Routines list. This is the visible confirmation that the Routine was saved.
To verify the saved configuration, open the Routine's actions menu and select Edit. Confirm that the Step, Trigger, and name are still present. Select Cancel if you do not want to make another change.
Edit or extend an existing Routine
Open Definer Options → Sources → [source] → Settings → Routines, open the Actions menu with the three-dot icon, then select Edit.
If you want to adapt a built-in Routine without changing the original, select Duplicate first, then select Edit on the copy.
Load a representative result in the preview before changing a Step. This lets you pick page elements and test the change against the kind of result the Routine will handle.
Select Add Step to add another action. Drag Steps to change their execution order, or use the remove control on a Step to delete it from the sequence.
Test a changed Step before testing the complete Routine. Select Save when the result is correct.
For the available actions and their fields, see Routine Steps. To change when the sequence starts, see Control when and how a Routine runs.